
- Gel nail polish offers a durable and long-lasting color that can remain vibrant and chip-free for up to two weeks.
- To set gel nail polish, you need to use a UV or LED lamp for curing. This process ensures a stiff and glossy finish that’s resistant to smudging.
- Gel nail polish comes in a wide range of colors, as well as options for various effects like glitter, matte, or metallic, allowing for creative nail designs.
- Achieving the best results with gel nail polish often requires professional application due to the curing process and the use of specific tools.
What Is Gel Nail Polish?
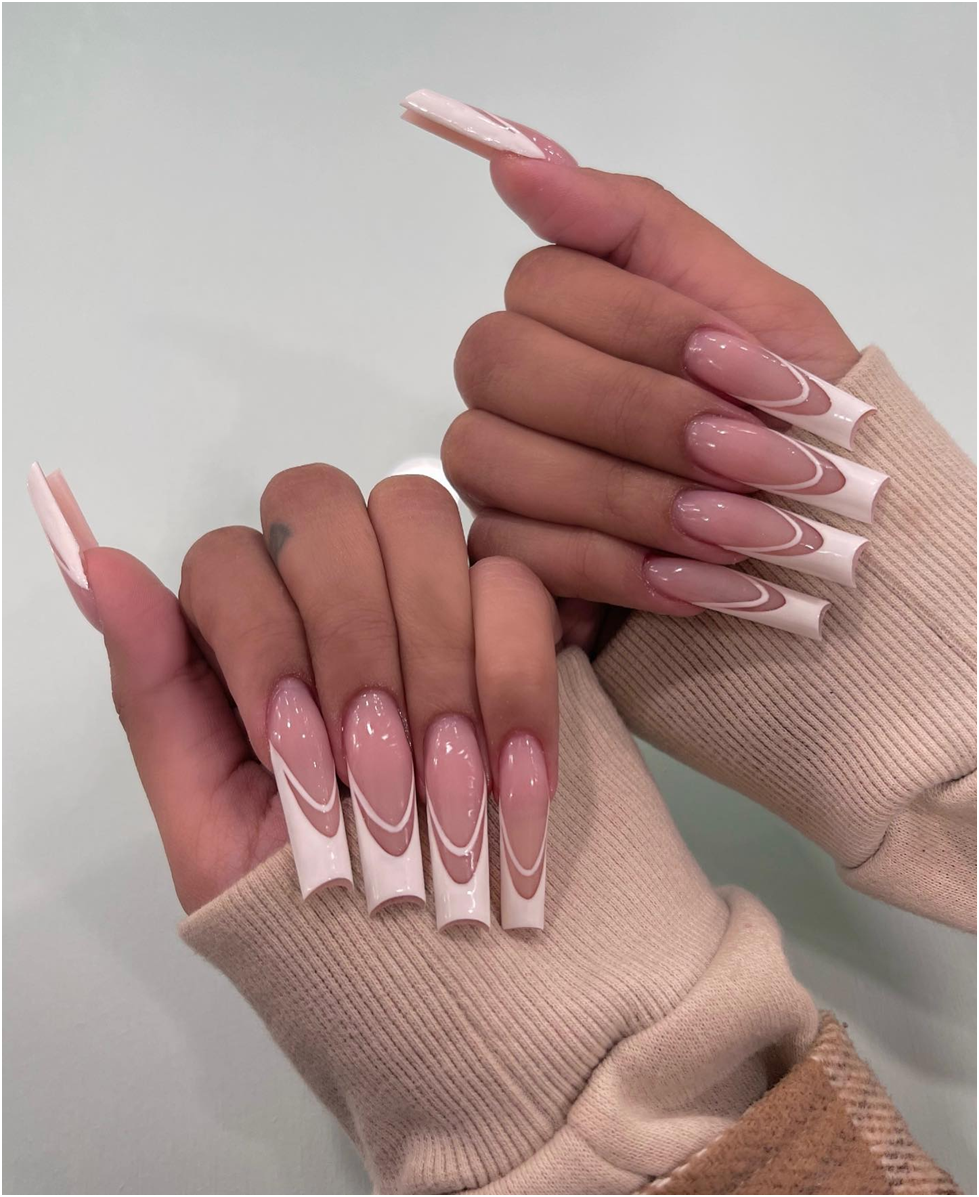
Image by @nailedby_lyss via Instagram
Gel nail polish is a popular cosmetic product used for manicures and pedicures that offers a longer-lasting and durable alternative to traditional nail polish.
It is a nail lacquer cured or hardened under a UV (ultraviolet) or LED (light-emitting diode) lamp.
This curing process creates a tough, glossy finish that can withstand daily wear and tear without chipping or fading for an extended period, often up to two or three weeks.
Gel nail polish typically comes in various colors and finishes, offering different options for nail art and personal expression.
The application process involves multiple layers, including a base coat, the colored gel polish, and a topcoat, each cured under the UV or LED lamp.
This curing mechanism sets the gel polish quickly, making it smudge-proof and resistant to everyday activities.
One of the main reasons for the popularity of gel nail polish is its longevity and resistance to chipping, which can be especially appealing for those who want to maintain a polished and manicured look for an extended period without frequent touch-ups.
However, the removal process usually requires soaking the nails in acetone or using specially designed gel polish removers, which can be more involved than regular nail polish removal.
Nonetheless, gel nail polish remains a favored choice for many individuals seeking durable and vibrant nail color options. Gel nail polish can look incredible.
When your nails are done, you can easily spend hours just staring at them because they look that good.
Except, when you get home you’re met with quite the surprise – the polish has already started peeling off!
This can be quite a bummer to experience, but as it turns out there are a number of reasons why this can occur.

There are two key reasons why your gel nail polish may be coming off not long after you’ve applied it. In one instance it could be because there’s excessive moisture build-up on the nails.
Other times, it could simply be because the nails have too much oil on them.
There are a number of problems that can happen when you are trying to apply gel polish to your nails.
Thankfully most of them come with simple solutions so your manicure can look fresh and untouched for so much longer.
Ultimately it’s best to remember that if your nails are wet or too moist before you apply the polish, it’s not very likely to stick.
To counter this, many people will put a nail prep primer on their nails before they apply the gel nail polish.
Basically, if you want to successfully apply the gel nail polish and ensure that it sticks onto your nails, it’s imperative that the nails are already dry before you start the application.
Nails can often absorb water in a similar way to sponges, and this means that they can get bigger in turn, at least temporarily.
For that reason, it’s a bad idea to paint your nails when you have recently come out of the shower or the bath, or after you have done the dishes.
Your nails are more expanded at this point meaning that it’s more likely that they will be damaged by the water.
Essentially, you’d end up wasting your time. Your nails would end up expanding thanks to the water, and then they’d begin to dry out and go back to the size that they were to begin with. When the nails shrink back to their original size, the nails can start to peel away.
What To Do About It

As you can probably tell, the solution to this particular dilemma is quite a simple one. All you need to do is avoid getting your gel nail polish done right after you’ve had your hands in water. This includes following baths or showers.
Before you get your gel nail polish done you will first need to ensure that the nails are thoroughly dried.
It can sometimes help to put the nails under a hairdryer to dry them off, but again you will need to let them cool before applying the polish because heat can cause nails to expand too.
You’d basically be creating the same problem for yourself otherwise, except with heat instead of water.
Alternatively, you can simply put some acetone on the nails after you’ve dried them off, since it will help the nails to dry out a little faster.
The Problem With Oil

Water isn’t the only thing that can cause some problems for you and your gel nails. If you have very oily nails, you may also encounter some problems.
This is especially problematic if your nails are naturally rather oily. In this scenario, you may have a hard time getting gel nail polish to stick at all.
With that being said though, where there is a will there is almost always a way, and that is the case with gel nail polish.
There are some things that you can do to help your gel nail polish to stick if you have oily nails.
Before You Get Started
- Prepare Your Nails: It’s crucial to remove any old polish or residue. It’s vital to have a clean canvas for the gel polish to adhere to.
- Shape and File: Shape your nails to your desired length and shape. Use a gentle file to smooth the edges and create an even surface.
- Buff Lightly: Lightly buff the surface of your nails to remove any shine. It helps the gel polish adhere better.
- Base Coat: These base coats are formulated to work seamlessly with their corresponding gel polishes, providing excellent adhesion and durability.
- Nail Dehydrator: A nail dehydrator is not precisely a base coat but is used before applying the base coat. It removes oils and moisture from the nail surface to improve adhesion.
What To Do About It
Before you apply your gel nail polish, you should always ensure that you take the right steps to prepare the nails in advance.
When you’re ready to start applying your gel nail polish, you should first start by getting a nail prep wipe solution or some rubbing alcohol and putting it on your nails first.
This is a good idea because any oil that’s lurking on your nails will be removed before you apply the polish.
In addition to that, it’s a good idea to do what you can to stay away from touching your nails using your fingers after you have applied the rubbing alcohol.
This is because the oil from your fingers may just end up getting back onto the nails again, making the whole ordeal of applying it in the first place pretty much redundant.
Rubbing alcohol isn’t effective for everyone, though. If you find that it isn’t working well for you then look for a nail dehydrator online. This is a product that you can apply to your nails to dry them out.
The product is easy to use and is applied in exactly the same way that you would apply any normal nail polish – it even comes in a similar-looking bottle.
Nail polish primers for gel polish also exist and these are useful for helping you to avoid polish chipping.
It’s easy enough to put just a bit of primer onto the whole nail or even only the places where chips tend to happen.
It’s usually a lot easier just to put the primer onto the tips of the nails though since it’s easier to remove that way.
If you apply a dehydrator and a primer before you apply the base coat, you may be able to avoid issues with the gel nail polish when you come to apply it on oily nails.
In some cases, people will put sunscreen on before they apply gel nail polish because the gel needs to cure under UV light.
This isn’t actually necessary because the lamps are effective at curing the nails really quickly, so you’re not going to cause any problems for your skin or nails as a result.
If you’ve put additional things onto your nails, things that aren’t designed for preparing your nails or rubbing alcohol, then these can cause issues because they can add more moisture into your nails.
For that reason, it’s a good idea to avoid using too many products when you are planning on putting gel polish onto your nails.
If you are still having issues with getting your nail polish to stay where it should then don’t apply any extra products to them unless they’re the ones we have listed above. This includes hand cream, sunscreen, and cuticle oil.
All of these things can cause problems for getting your gel nail polish to stick properly on your nails.
Lack of Base Coats

If you’re lazy, you aren’t going to like this one. Always, always apply a base coat before putting gel polish on.
This is because these coats of polish are specially made to help the gel to stick to your nails.
The colored polish is then made to adhere to the base coat. If you don’t apply the base coat then you will have issues getting the polish to actually stick to your nails.
Keep in Mind
- Use Nail Oil: Apply cuticle oil and nourishing hand cream regularly to keep your nails and cuticles healthy and moisturized.
- Quality Products: Use high-quality gel nail products from reputable brands to ensure a professional and long-lasting result.
- Prevent Overexposure to Water: Prolonged contact with water might break the adhesive that holds gel paint to your natural nails, so try to avoid getting too wet. Only handle large amounts of water while wearing gloves.
Help! My Nail Polish Keeps Chipping

A lot of people seem to have this idea that gel nail polish is indestructible and incapable of actually chipping. This isn’t the case at all.
Chips aren’t as likely to happen if the polish has been applied well, but that doesn’t mean that it’s impossible for it to chip at all.
You could do everything right and there’s still a chance that the polish may chip at some point down the line.
Gel nail polish does dry hard and that’s why it can be easy to think that nothing is going to chip them, but that’s not true.
It’s a good idea to be careful with what you are doing when you have gel nail polish in order to avoid chipping your nails.
If you are a little concerned that your nails are going to chip, then the best solution is to make the gel nails a light color that’s similar to the color of your nails. This means that if any chips do happen you are far less likely to notice them.
In some cases, your gel nails might also end up chipping if you haven’t applied them correctly. Doing something called capping will help you to reduce the likelihood of chips in your polish.
Okay, so what is capping?
Get the brush of your nail polish and then run it across the tips of your nails. Do this before you cure, and you have then capped your nails.
This can be a bit tricky to do so we definitely recommend finding a video tutorial since what we have mentioned here is a fairly simple explanation of it. It’s worthwhile to do this though since your nails will look beautiful and fresh for much longer.
When you first try to do it there is a chance that you will get some uneven tips or some tips that could look somewhat out of place. If you do see this happening then all you need to do is to file them and put another coat on top in order to seal it.
What To Do About It
If you are experiencing chipping because you haven’t applied a base coat, it’s not hard to figure out what you need to do in order to ensure that you don’t have the problem in the future.
That’s right – just put a base coat on first. Simple!
Using a gel base coat is always necessary if you would like to get the best possible results. It may seem like a hassle, but it’s vital if you want your gel nails to stand the test of time.
Quick Guide to Prevent Fading of Gel Nail Polish
- Avoid Overloading the Brush: Be mindful not to overload the brush with gel polish to prevent uneven application and pooling around the cuticles.
- Thin Gel Polish Layers: Layer the gel polish evenly and thinly. Thick layers can cause an uneven curing.
- Cap the Edges: When applying the base coat, color, and top coat, be sure to cap the free edge of your nails. It helps prevent chipping and lifting.
- Top Coat: Apply a thin, even layer of gel top coat to seal and protect the color.
- Seal the Free Edge: When applying the base coat, color, and top coat, be sure to seal the free edge of your nails. It helps prevent chipping.
Gel Nail Polish Application Time

You may be surprised to know that you can usually apply gel nail polish a lot faster than you can apply normal polish.
You will eventually get used to applying it, and thanks to this it’s easy enough to get the nails completely sorted in less than an hour and a half. This isn’t just for applying the topcoat either – this includes when you are preparing and painting the nails.
If you have a high-quality lamp then this can have a big effect on how long it takes to apply the polish though. It’ll take longer if the lamp isn’t very good.
Pro Tip
Ensure proper nail prep by cleaning your nails, gently buffing the surface, and using a quality gel base coat for improved adhesion and longevity.
My Nails Look Dull – Why?

If you are noticing that the nails are looking a little boring and without their shine, then it’s most likely because the curing process has gone wrong.
If the nails haven’t been cured correctly then they can end up losing their color or looking less shiny. It generally happens because you have cured the gel nails too much.
If this happens to you, all you need to do is cure the nails for a shorter duration of time.
Play around with it to figure out what will work for you. It’s worth using a different lamp too since some lamps and polishes simply don’t work well together.
Fun Fact
Gel nail polish, known for its durability and long-lasting shine, was first introduced to the market in the 1980s. It was initially developed for dental use. Nail technicians and professionals later adapted this technology for nail enhancements, leading to the creation of the popular gel nail polish we know today.

- 25 Anime Makeup Looks To Help You Discover The Enchanting World Of Anime Makeup in 2025 - September 22, 2023
- 41 Toe-Tastic Toe Nail Designs For Every Season - September 21, 2023
- 75 Dazzling Extensions Of Glamorous Acrylic Nail Designs To Rock Unique Looks - September 20, 2023