
- The Kiss Acrylic Nail Kit is designed for individuals to create acrylic nails in the comfort of their own homes.
- Properly prepare your natural nails by cleaning, trimming, and filing them before applying the acrylic.
- The kit may include nail tips or nail forms, giving you the choice of creating nail extensions.
- Apply a topcoat or sealer included in the kit to protect and enhance the appearance of your acrylic nails.
Let’s face it: everyday life is busy!
Whether you’re anything like us and can’t stand spending hours sitting around getting your nails done at your local salon (seriously, why is it so boring?), or you’re simply interested in saving some money and learning how to do your nails by yourself.
The Kiss Acrylic Nail Kit is a beginner-friendly first step into the world of DIY acrylic nails.
If you’re currently planning on trying your hand at your own acrylic nails (pardon the pun) and you’re a little bit scared of giving it a go for the first time – then rest assured that you’re not alone.

There’s no denying that acrylics are pretty technical and require plenty of know-how and correct technique, but luckily enough, we’re here to lend you a helping hand in that department.
In this ultimate guide to doing your very own acrylic nails from home, we’re going to be talking you through how to do your very own acrylics with the bestselling, cult-favorite Kiss Acrylic Nail Kit.
From preparation to application and tips on how to make your acrylic nails last longer – we’ve covered all bases to guarantee professional results.
So, nail file at the ready? Whenever you’re ready, let’s jump right in!
Before You Get Started
- Ensure you have the kit components, including acrylic powder, liquid monomer, and brushes, as well as any additional tools like nail files and cuticle pushers.
- Start with clean, dry, and properly shaped natural nails, free from old polish or residue.
- Choose a well-ventilated space to minimize exposure to acrylic fumes and odors during the application process.
- Read and understand the kit’s instructions, as proper technique is essential for achieving a successful acrylic manicure.
- Acrylic application can be intricate. Dedicate ample time to the process to achieve the desired results without rushing.
Kiss Acrylic Nail Kit: First Impressions

One of the best parts about the Kiss Acrylic Nail Kit is that it comes with everything you need to do a set of acrylic nails.
We really like this, because it means that you won’t have to worry about trying to figure out what you might need to successfully do your very own acrylics – let alone what the cost might be!
Instead, the Kiss Acrylic Nail Kit is a simplified and easy-to-follow kit that is suitable for nail buffs of all levels and abilities – you can even use this kit if you have never attempted to do your own acrylic nails before!
If you don’t yet have your Kiss Acrylic Nail Kit at hand or you’re not sure how to tell what from what, here’s a quick breakdown of what comes inside your Kiss Acrylic Nail Kit:
- Nail tips
- Acrylic dip powder
- Acrylic Liquid
- Fat drying glue
- Application brush
- File
- Cuticle pusher
As you might have already been able to guess, the Kiss Acrylic Nail Kit is slightly different follows a slightly simplified approach to doing your own acrylic nails.
This is precisely why it’s so great for first-timers, or for those who aren’t overly confident in the application of acrylic.
This means that armed with this particular acrylic nail kit, you won’t need to worry about having to go to the hassle of using an electric drill, as the dip powder is specifically designed to apply smoothly and evenly.
This means that you’ll end up with professional finish acrylics, time and time again!
To follow onward, let’s take a look at our 7 step checklist:
- The preparation of your natural nails, including pushing back the cuticles
- Choosing the right nail tips that will fit the individual shape and size of your natural nails
- Application of the nail tips
- The preparation of the acrylic liquid and powder
- Application of the acrylic to the natural nail
- Buffing, filing, and shaping the acrylic nails
- Coloring the nails and maintaining them
Why Should You Choose The Kiss Acrylic Nail Kit?

If you’ve already gotten this far into this guide, then we’re going to assume that you’ve already got your own Kiss Acrylic Nail Kit, or you’re waiting for it to arrive in the mail!
Nevertheless, if you’re still on the fence about whether or not you should use it for your nails, then there are a variety of benefits that will come along with opting for the Acrylic Nail Kit over other methods of acrylic nail application.
For starters, as we have already mentioned above, one of the biggest benefits of opting to use the Kiss Acrylic Nail Kit is that you won’t need to worry about going to the often annoying trouble of heading down to your local nail salon.
You will be able to do your acrylic nails from the comfort of your very own home.
Thanks to this, it means that you won’t need to worry about having to deal with long wait times or making small talk, which is often one of the biggest annoyances that most people tend to experience when hitting the salon for a fresh mani.
In addition to that, another big benefit of choosing to use a Kiss Acrylic Nail Kit over other methods of acrylic nail application is that it is more convenient and will fit into a hectic, busy lifestyle.
It’s a well-known fact that, besides offering a simplified way to do acrylic nails, the Kiss Acrylic Nail Kit also offers one of the quickest ways to achieve acrylic nails, as it requires fewer steps than other methods.
So, regardless of whether you’re a busy mom that doesn’t have a whole lot of time to herself, or you spend your days in back to back meetings and carrying out the daily commute – the Kiss Acrylic Nail Kit will ensure that you never have to be without your perfectly manicured nails.
Another big benefit of using a Kiss Acrylic Nail Kit over getting them down by a professional nail technician is that you won’t have to worry about breaking the bank.
If you’re a seasoned acrylic nail haver, then we’re sure that you’ll be in complete agreement with us when we say that, when it comes to acrylic nails – after that very first time getting them, it’s all too easy to fall into the trap of always having them.
Getting regular infills every 2-3 weeks can easily add up to quite a lot of money throughout the month, and this financial commitment isn’t always something that people want to keep up with.
This is why the Kiss Acrylic Nail Kit is such a great alternative!
At a fraction of the cost of what it would cost to get your nails professionally done at your favorite salon.
The Kiss Acrylic Nail Kit will allow you to achieve professional-quality nails at a fraction of what you would usually spend at your bi-weekly nail salon visit.
Last but certainly not least, one of the biggest benefits that you can expect from using the Kiss Nail Acrylic set is the ability to fix your acrylic nails in the event that one of them pops off, or you notice that one of those cracks/chips.
As we’re sure you’re already well familiar with, going and getting an acrylic nail fixed is one of the most frustrating things to have to do, especially when you already don’t have a lot of time to spare throughout your busy life.
However, if you decide to opt for the Kiss Acrylic Nail Kit, if you do find that a nail breaks and you need to repair it, you will have all of the resources you need to go ahead and fix up your nail with a brand new one yourself. Impressive or what?
Can Beginners Use A Kiss Acrylic Nail Kit At Home?
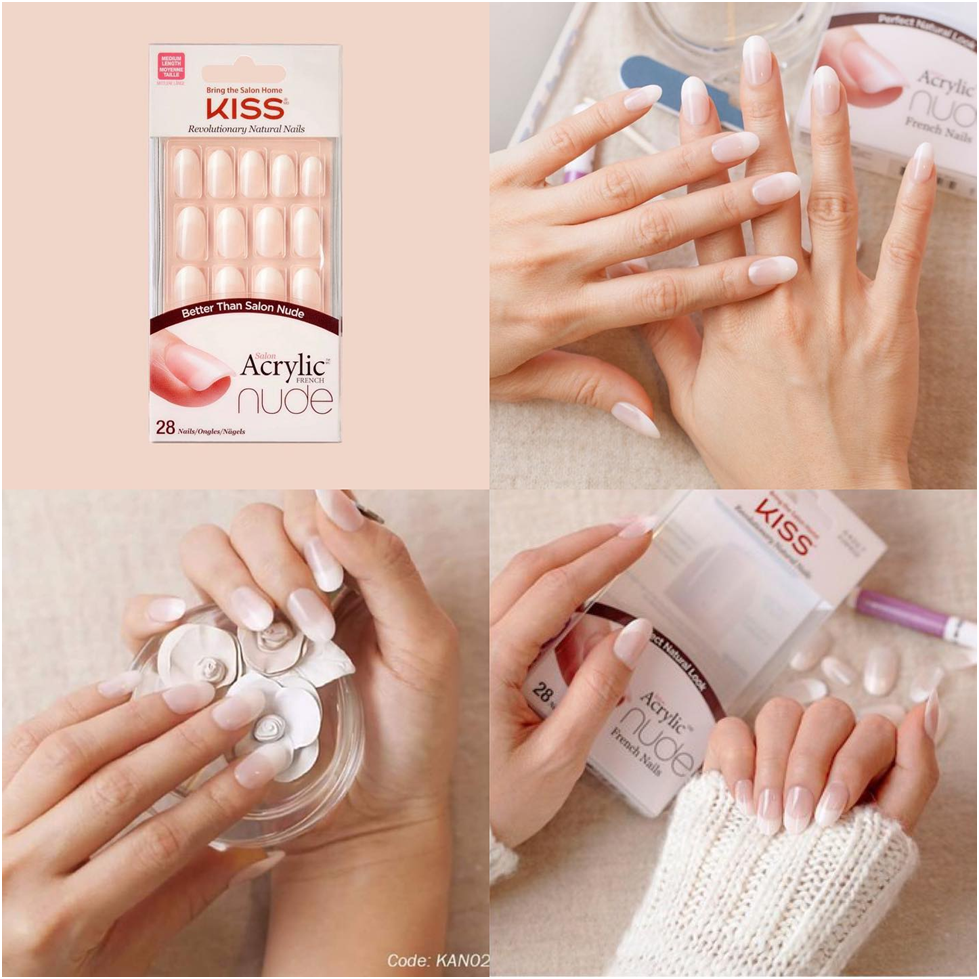
Image by @pinkpotion_bh via Instagram
Yes, many Kiss Acrylic Nail Kits are designed with beginners in mind, making them accessible for those new to acrylic nail application.
These kits typically include detailed step-by-step instructions that are easy to follow, making the process more user-friendly.
Additionally, they often provide pre-sized nail tips to simplify the fitting process. While there may be a learning curve, beginners can achieve satisfying results with practice and patience.
However, it’s essential to read and follow the kit’s instructions carefully and, if needed, seek online tutorials or guidance from experienced nail enthusiasts to ensure a successful and enjoyable DIY acrylic nail experience at home.
Can I Apply Nail Polish Or Nail Art On Top Of Kiss Acrylic Nails?
You can apply nail polish and nail art on top of Kiss acrylic nails. Acrylic nails provide a stable and smooth canvas for nail art and polish, allowing endless creative possibilities.
Once the acrylic nails have correctly been set and shaped to your liking, you can use regular nail polish, gel polish, or nail art products to add color, designs, and embellishments.
Allow the polish to dry or cure fully before adding additional layers or decorations to achieve long-lasting and beautifully adorned acrylic nails. Whether you prefer a classic look or intricate nail art, acrylic nails offer versatility for expressing your unique style.
Kiss Acrylic Nail Kit Essentials:
- All-In-One Kit: The Kiss Acrylic Nail Kit offers a comprehensive solution for at-home acrylic nail applications, including acrylic powder, liquid monomer, and essential tools.
- User-Friendly: Designed for beginners, the kit simplifies the acrylic nail process, making it accessible for those new to nail enhancements.
- Proper Nail Prep: Before application, ensure your natural nails are clean, well-shaped, and free from old polish or debris.
- Instruction Adherence: Follow the provided instructions meticulously for the best results. Proper technique is crucial for a successful acrylic manicure.
How To Use The Kiss Acrylic Nail Kit: Step-By-Step Instructions!

So, now that you know about what the Acrylic Nail Kit entails and all of the benefits that you can expect to get from this kit, in particular, we are now going to be taking the time to talk you through how to use this Acrylic Nail Kit!
As we have already briefly touched upon throughout this guide, using the Acrylic Nail Kit is one of the easiest ways to apply acrylic out of all the other do it yourself alternatives to heading down to the nail salon.
This means that it comes with everything that you’ll need to do your nail by yourself.
From the file to the glue, nail tips to the acrylic powder – you won’t need to worry about having to go to the trouble of purchasing anything separately, which will also mean that you get the very best value for your money, too.
Nevertheless, even though the Kiss Acrylic Nail Kit has built up a reputation for being one of the easiest-to-use acrylic DIY kits on the market right now, it can still seem a little bit confusing to use -especially if it’s going to be your first time.
So, to help make sure that your first time attempting to do your own acrylic nails is a success, below we are going to be providing you with some super simple and easy to follow instructions for your Kiss Acrylic Nail Kit.
Keep in Mind
- Clean Workspace: Set up a clean and organized workspace with ample lighting for precise application.
- Patience: Acrylic application requires patience; take your time to ensure a professional finish.
- Acrylic Odor: Be aware of the acrylic odor; work in a well-ventilated area or consider using a fume extractor for better air quality.
- Nail Health: Prioritize the health of your natural nails by avoiding over-filing and following proper removal techniques.
- Practice: Expect some learning curve if you’re new to acrylic nails. Practice and experimentation will lead to improved skills and results over time.
Whenever you’re ready, let’s take a look at them below:
Set Up Your Workspace

First things first, you’re going to need to make sure that you have set up your workspace prior to even thinking about grabbing a nail file.
By taking the time to set up your workspace, you will have a clean and organized area to do your nails properly.
This will help to ensure that you end up with professional quality nails – even if it’s going to be your very first time attempting to do them by yourself.
Take your Acrylic Nail Kit out of its packaging and set everything up on your chosen surface (table or desk is best).
If you don’t want to make a mess, then we recommend putting down a protective cover over the surface of the table/desk you are going to be doing your nails on, such as clean paper cloths.
Ideally, we recommend that you do your nails in a well-lit area of your home, as a low-lit area might mean that you struggle to do your acrylic nails to the standard that you would like.
However, if you do not have an area of your home that is well-lit by sunlight or you’re simply planning on doing your nails later in the day, then doing your nails in a well-lit room (such as right next to a lamp) will work just as well.
Once you have picked the appropriate space for doing your nails, we then recommend that you grab yourself a seat with adequate support, as you’re going to be sat down in one spot for about an hour.
As a side note, we also recommend that you set everything up on a desk or table, as this will be optimally comfortable for the position that you’re going to be sitting in while applying the acrylic.
Prepare Your Natural Nails

After you have finished setting up your nail station workspace, you will then be ready to go ahead and jump right in with the manicure process!
Before doing so, though, we recommend that you grab some water and change into a set of comfy clothing, as like we said, you’re going to be doing your nails for a minimum period of around one hour.
While you’re at it, why don’t you put some music on or your favorite movie?
As we’re sure you’re already well aware, doing acrylic nails can be quite a lengthy process, so some background entertainment will help to prevent you from becoming bored halfway through!
When you’re ready to begin, you’re going to need to prepare your natural nails ready for the application of acrylic powder and liquid.
To do this, you’re going to first need to make sure that your natural nails are completely bare, which will mean removing leftover nail polish or acrylic from your previous manicure.
After you have cleaned your nails and removed the leftover polish/acrylic, you will then need to shape your nails so that the tips can be applied more easily.
To do this, trim down your nails if they are long, and then go in with the included nail filing emery board that would have come with the kit to help roughen up the texture of your natural nails.
It’s very important that you take the time to give your natural nails some roughed-up texture.
Otherwise you’re going to find that your acrylic nails pop off far quicker than you would like, as the acrylic won’t be able to bond itself properly to a smooth surface.
After you have done this, proceed to take the included cuticle pusher and gently push back your cuticles so that they won’t get in the way when it’s time for you to apply the acrylic.
To finish off, take a piece of cotton and gently wipe it across the surface of each nail to help remove any oily residue.
The last thing that you want to do is apply acrylic to an oily nail, as the acrylic won’t be able to bond itself properly to your nails, and will inevitably lead to them popping off way sooner than you would like.
Pro Tip
When using a Kiss Acrylic Nail Kit, prep your natural nails properly, apply thin layers of acrylic, and ensure even filing for a smooth finish. This kit is beginner-friendly, but attention to detail results in a professional-looking manicure.
Apply The Tips

After your natural nails have been prepared, you will then be ready to apply the false tips!
As you will see from your Kiss Acrylic Nail Kit, there are a variety of different sizes available for you to choose from, which means that you will need to spend a few moments comparing the different sizes to find the ones that fit closely to your natural nail sizes.
As soon as you find the sizes that fit each nail best, you will then need to go ahead and grab the nail glue and apply them to each of your nails.
For the best results (and to avoid getting into any sticky situations) we recommend that you apply the glue into the tip of the nail extension, and then apply that directly to your natural nail.
Applying to your natural nail can also work just as well, but do keep in mind that there’s a greater chance of the glue running off the nail and onto your fingers, and that could get messy!
Remember, when you apply each tip to your natural nails, the goal is to only apply it to the very top of your nail bed so as to leave enough space for the acrylic to be applied, too.
If you apply the fake nails across the entirety of your nail beds, then you’re going to find that the acrylic you apply over the top will make no difference, as it will not have been applied to your natural nail bed, and in turn, will not have correctly bonded.
Once you have done this, you can then apply a primer if you have one.
Apply The Acrylic

After you have applied the nail extensions to your natural nails, you will then be ready to go ahead and apply the acrylic.
To do this, you’re going to first need to take the acrylic liquid bottle and the acrylic powder container that will have come inside your Kiss kit.
Take a dish and pour the powder in, and then take another dish and pour the liquid in.
Keep in mind that the liquid smells very strong and contains fumes that you shouldn’t inhale too much of, which is why we recommend putting on a mask and opening a window for this step.
With your brush, dip it into the liquid and wipe the excess off on one side only, before proceeding to dip the brush into the powder – creating a circular ball that is the size of about a pea.
When you’re ready, take your chosen finger and apply the acrylic ball into the middle of your nail, and begin to gently drag the acrylic in a tapping motion across either side of your nail.
Once you have done this, begin to work the acrylic up to the top of your nail, finishing with pulling the acrylic neatly downwards until it meets the edge of your cuticle line.
Once you have done this, tap the sides of your nail to help even out any thicker areas of acrylic, and brush over the nail a few times to help make sure that the acrylic has been evenly distributed.
Continue doing this until all nails have acrylic on them.
Shape And Color

Once you have finished applying the acrylic, you will then be ready to shape the nails into your desired look – such as a coffin or square shape.
After doing this, you should smooth out any imperfections or bumps across the surface until the acrylic feels smooth and even across all nails, as this will ensure that the polish you choose will glide on more easily.
Fun Fact
Kiss Acrylic Nail Kits were introduced in 1989, revolutionizing at-home nail enhancements. They provided an affordable and accessible way for individuals to achieve salon-quality acrylic nails, making nail art and self-expression more accessible to a wide audience.
What should I do if I encounter issues or mistakes during the application process?
Address lifting or air bubbles by gently filing and reapplying acrylic. For uneven application, file and shape nails carefully.
If tips are too long, trim them. Fix smudging with a nail wipe and reapplication. Manage excess acrylic around cuticles with a cuticle stick or file.
Resolve glue mishaps with acetone. Correct painting errors using a fine brush dipped in remover. Seek online tutorials or guidance for specific issues. Practice and patience will improve your skills.

- 25 Anime Makeup Looks To Help You Discover The Enchanting World Of Anime Makeup in 2025 - September 22, 2023
- 41 Toe-Tastic Toe Nail Designs For Every Season - September 21, 2023
- 75 Dazzling Extensions Of Glamorous Acrylic Nail Designs To Rock Unique Looks - September 20, 2023