
- Goddess braids are a popular and stunning protective hairstyle that can be achieved by expertly weaving large cornrows on the scalp.
- Before starting, ensure that your hair is clean, moisturized, and detangled for a smooth braiding process.
- Goddess braids can be done in various sizes, lengths, and styles, allowing for creative customization to suit your preferences.
- Proper parting and sectioning of the hair are crucial to creating clean and symmetrical braids.
- Use high-quality braiding hair extensions to add length and thickness to your goddess braids, if desired.
Goddess braids are a staple of beautiful black hairstyling, but you don’t need to be a person of color to master the technique and wow everyone with a gorgeous new style.
Goddess braids are so practical as they ensure wayward hair is kept under tight control, but you still get to enjoy the benefits of having long hair.
You can put them up with no fuss or wear them long down your back. However, you choose to arrange them, you can always trust that they’ll always look neat, tidy, and feminine.

Goddess braids have actually been around for quite some time, and no wonder because they are pretty yet sensible for every activity.
Gone are the days when girls could sit around with delicate hairstyles that couldn’t take a soft gust of wind without messing it all up.
Girls these days need hairstyles that are ready for anything and keep irritating wisps of hair out of your eyes, so you can focus on being your amazing self every day.
We’re strong and beautiful, and our hair needs to stay on-brand with that because nothing is going to get in our way.
Goddess braids are super popular right now, so we’re going to show you how to do them step by step and help you master the technique with our top tips. Let’s get braiding.
What You’ll Need
Before you start, you’ll need the following things to make beautiful Goddess braids.
- Shampoo that is free from sulfates
- Moisturizing conditioner
- Styling gel
- Edge control
- A comb with a pointed end (such as a rat tail comb)
- A wide-toothed comb
- Hair clips and bands
- A Brush
- Hair glue
- Scissors
- Waving hair
- Braiding hair
Braiding Hair
Human hair will make your Goddess braids look way better than synthetic, but it’s still possible to get a good texture and pattern with synthetic braiding hair.
Human hair is obviously more expensive than synthetic, so choose braiding hair that’s in your price range because you’re going to need quite a bit of it.
You’ll be needing to get between 5-7 packs of braiding hair depending on the size of your head the size of the braids that you want and the length of your hair.
In terms of waving hair, you will only need one pack or two for the ends.
Hair Prep
Goddess Braids can last from four to six weeks, so you need to prepare your natural hair carefully before you begin your braids.
To create perfect braids of any kind, the first step is always to wash your hair.
Do not use a shampoo that is harsh on your hair. Instead, select one that is free of parabens and sulfates. You don’t want to damage your hair before you start.
Clean your hair length as well as your scalp because you won’t be able to clean your scalp for as long as your braids are in.
Conditioning comes next. Use one that moisturizes but is otherwise appropriate for your hair type.
Comb your conditioner through with a wide-toothed comb to aid detangling and then rinse with warm water.
If you want to use a leave-in nourishing conditioner or hair product, this is the time to apply it.
You may find that a leave-in product will help your hair retain shine and lock in moisture while your hair is protected inside the braids.
Now you have everything you need and your hair is in a good condition, you can start braiding.
There are various methods of creating Goddess braids, but for each of them, you should start by sectioning off your hair into easier-to-handle sections.
If you are a newbie to braiding, try bigger ones for your first time. The smaller they are, the longer it takes to do the whole head and the more fiddly they are to make, too.
Before You Get Started
- Goddess braids are a type of cornrow hairstyle characterized by their intricate and elaborate patterns.
- These braids are named after their regal and goddess-like appearance, making them a statement style.
- They offer a protective hair option, safeguarding natural hair from damage.
- Proper parting and sectioning are essential to achieve well-defined Goddess braids.
- Maintenance involves regular moisturization and protective styling practices for longevity.
Method 1 – Box Goddess Braids
The Box in “box braids” refers to the neat box shape you see on the scalp as you section the hair into neat squares of box shapes.
Using a thin, pointed-end comb will help you get the right angles clean.Once you have the section of hair, you should start to braid.
Add braiding hair as you go to make the texture neat and the braid consistently thick.
Braid in the waving hair partway down and once it is securely braided in, clip the wavy hair out of the way to leave it out of the braid.
This creates the neat but-carefree look that you’re going for.
Some people like to use several pieces of waving hair per braid by adding it in several places down the braid, but the place you want the wavy hair most is right at the bottom because it will look like it’s your natural hair at the bottom of the braid.
Method 2 – Goddess braids for medium, short hair
This method involves braiding your own hair with two strands of wavy hair and then wrapping the braids in braiding hair.
The result is very stylish and looks a little dreadlock-like with some stunning waving ends for about five inches after your own hair ends.
This is a great way of extending your own hair length by a little to add a lot of sassy style.
Method 3 – Beginner-friendly Home Made Goddess Locs
Tommi shows us how to do goddess locs on short, ultra curly hair. She has purposely gone for rougher textured braiding hair to add a tribal texture to them.
She combines different kinds of braiding hair to add bulk and texture. This result is a full head of volumized, thick braids with just the right hint of mess.
She added some serious length to her own hair length but it does look really natural with a primal African flare.
Definitely, one to pair with some tribal metal hair jewelry to totally change your appearance while protecting your natural hair.
So many girls of color choose the silkiest, straightest braiding hair they can find, but Tommi stays true to her roots (in more ways than one) by purposely adding frizz and rough textures to her long braids.
By the time she’s done, she looks like a warrior queen with killer cheekbones and it’s such a wonder how she has managed to use so much extension hair and yet managed to create braids that look completely natural.
She also has some great tips and ideas about how to style and wear your Goddess braids when you’re done.

Method 4- Two Reverse Goddess French Braids
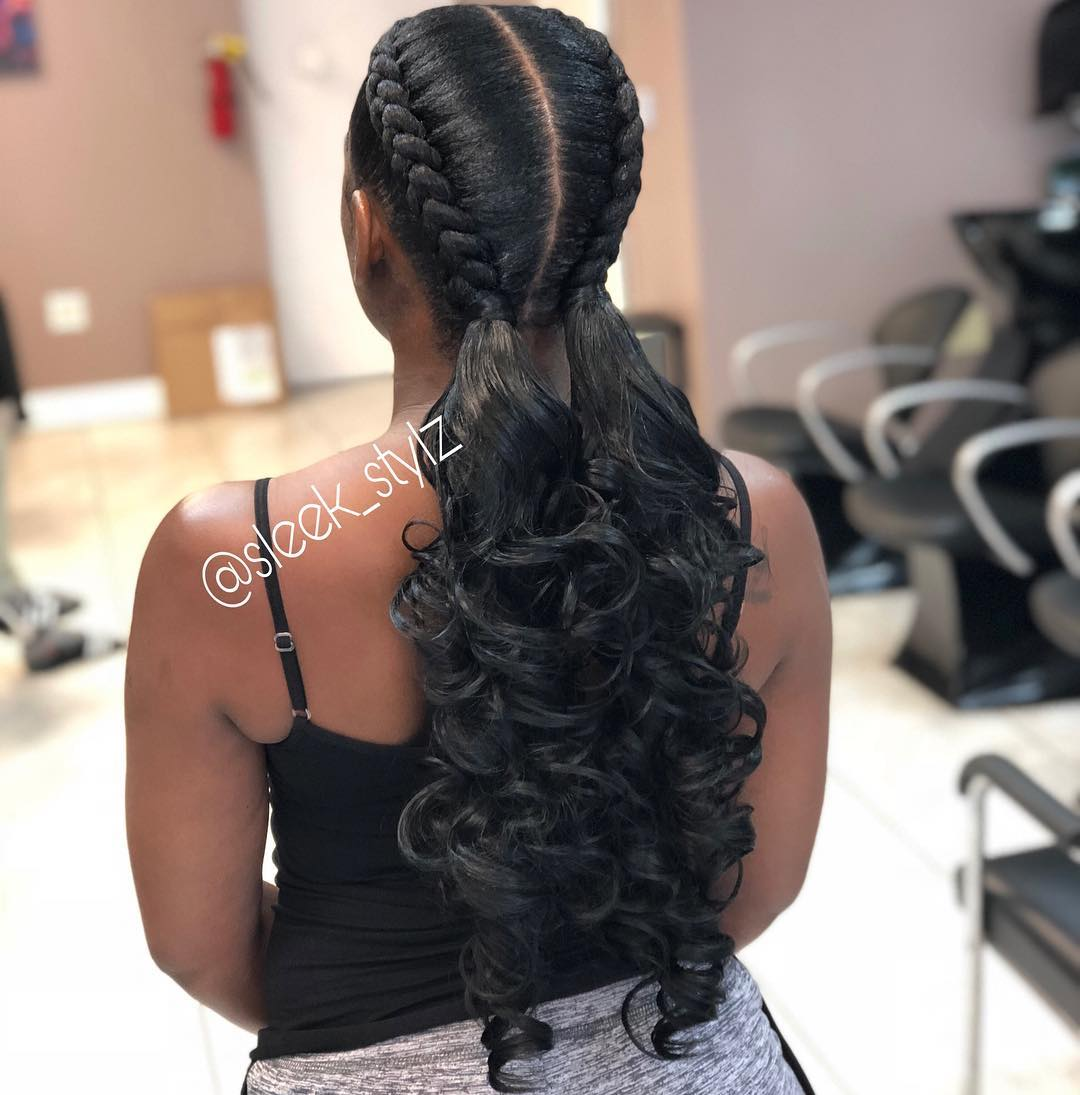
Image by @sleek_stylz via Instagram
These two thick Goddess braids at the rear that open into wavy long pigtails are a highly alluring option because they combine youthful vigor with timeless grace.
Jet black loopy extensions are neat and straightforward to maintain, and they look great on women with short to medium-length thick natural hair.
Method 5- Three Parting Goddess Braids
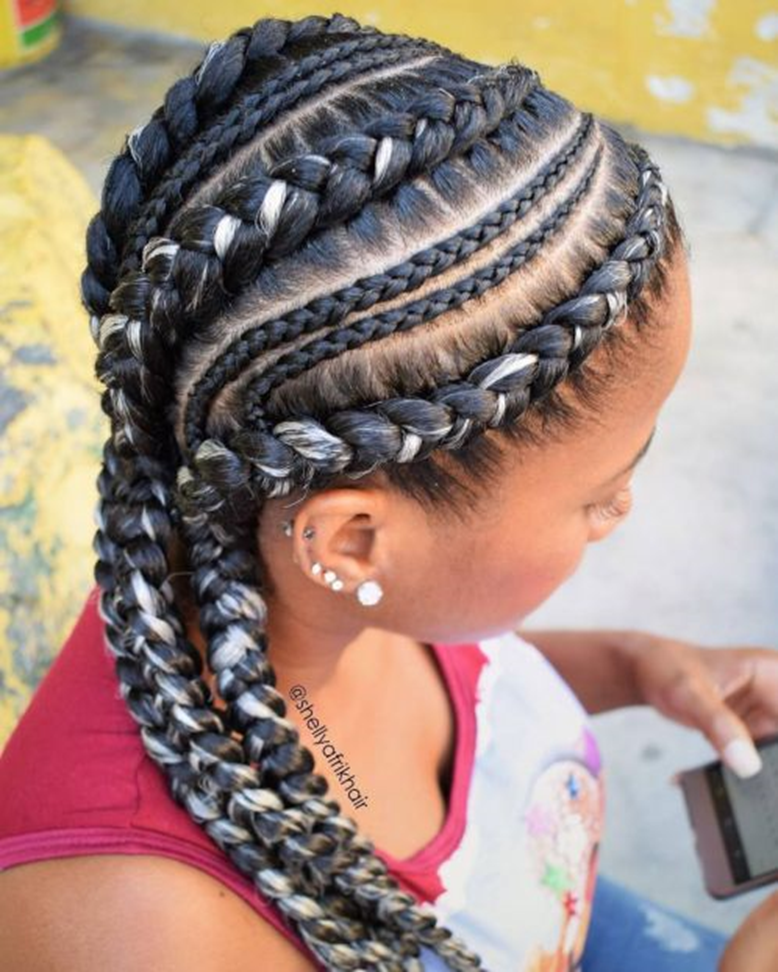
Image by @therighthairstyles via Instagram
Three Goddess braids that span the top of the head diagonally are made out of white-blonde hair extensions.
Two slender separation braids divide the main braids. This hairstyle stands out thanks to the adorable accent of the racing-splitting braids.
Quick Goddess Braids Guide
- Versatile Styles: These intricate braids offer various patterns and adornments, allowing for personal expression and creativity.
- Protective and Low Maintenance: Goddess braids serve as a protective style, promoting hair health, and they are relatively low in maintenance.
- All Skin Tones Welcome: Suitable for all skin tones, these braids enhance the natural beauty of fair to deep complexions.
- Enhance with Makeup: Complement your Goddess braids with rosy or beige eyeshadow and neutral or dark lip colors to complete your chic and cultural look.
Method 6- Updo with Feed-In Goddess Braids
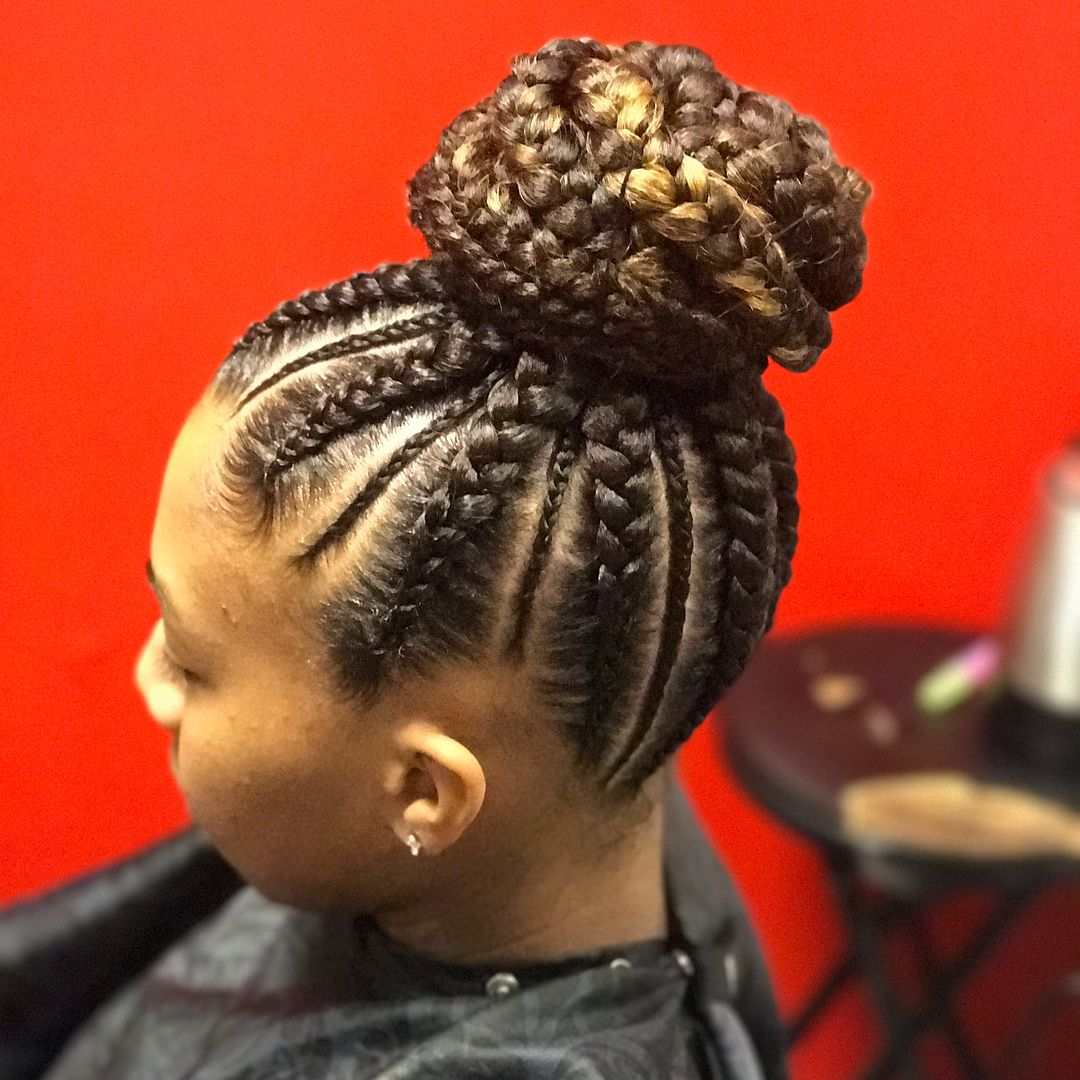
Image by @thebraidkartel via Instagram
The high braided bun and majestic and dignified goddess updo are timeless hairstyles.
Straight up from the hairline, thicker cornrows and interspersed small parting braids meet on the crown and are finished with a tall, elegant bun.
Method 7- Scalp plaits accompany four thick goddess braids
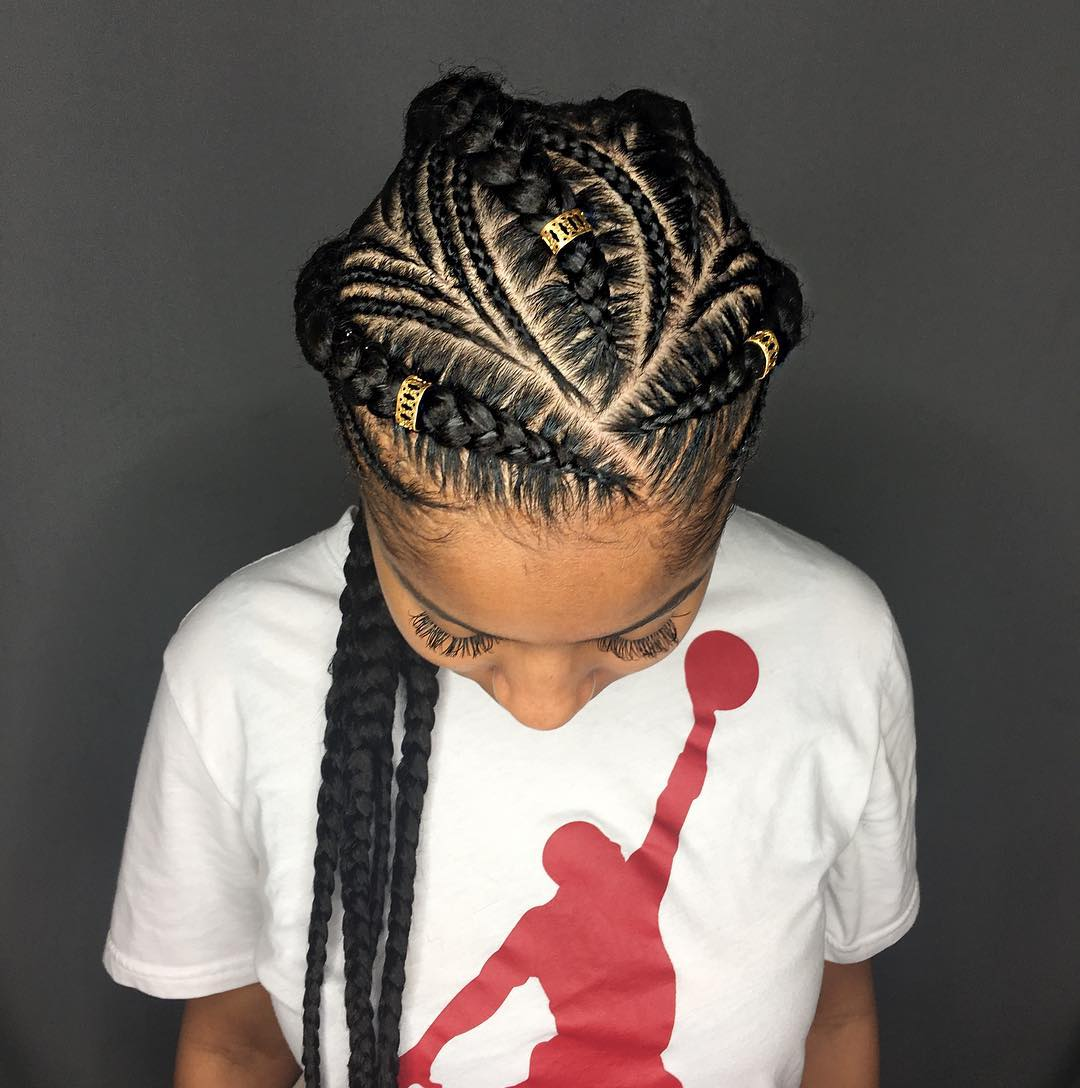
Image by @odia_le_salon_academie via Instagram
The fact of the matter is that almost anyone can wear elaborate hairstyles.
Combining chunkier plaits with petite goddess braids can achieve a queenly urban look. These flaring rows are just beautiful.
Method 8- Geometric Goddess Braids

Image by @val_can_braid via Instagram
Feed-in braids provide you the chance to combine two different hairstyles into one.
Add an angled braided pattern between the tried-and-true pigtails and feed it into the main braids to customize them.
Method 9- Curly Goddess Braids Updo
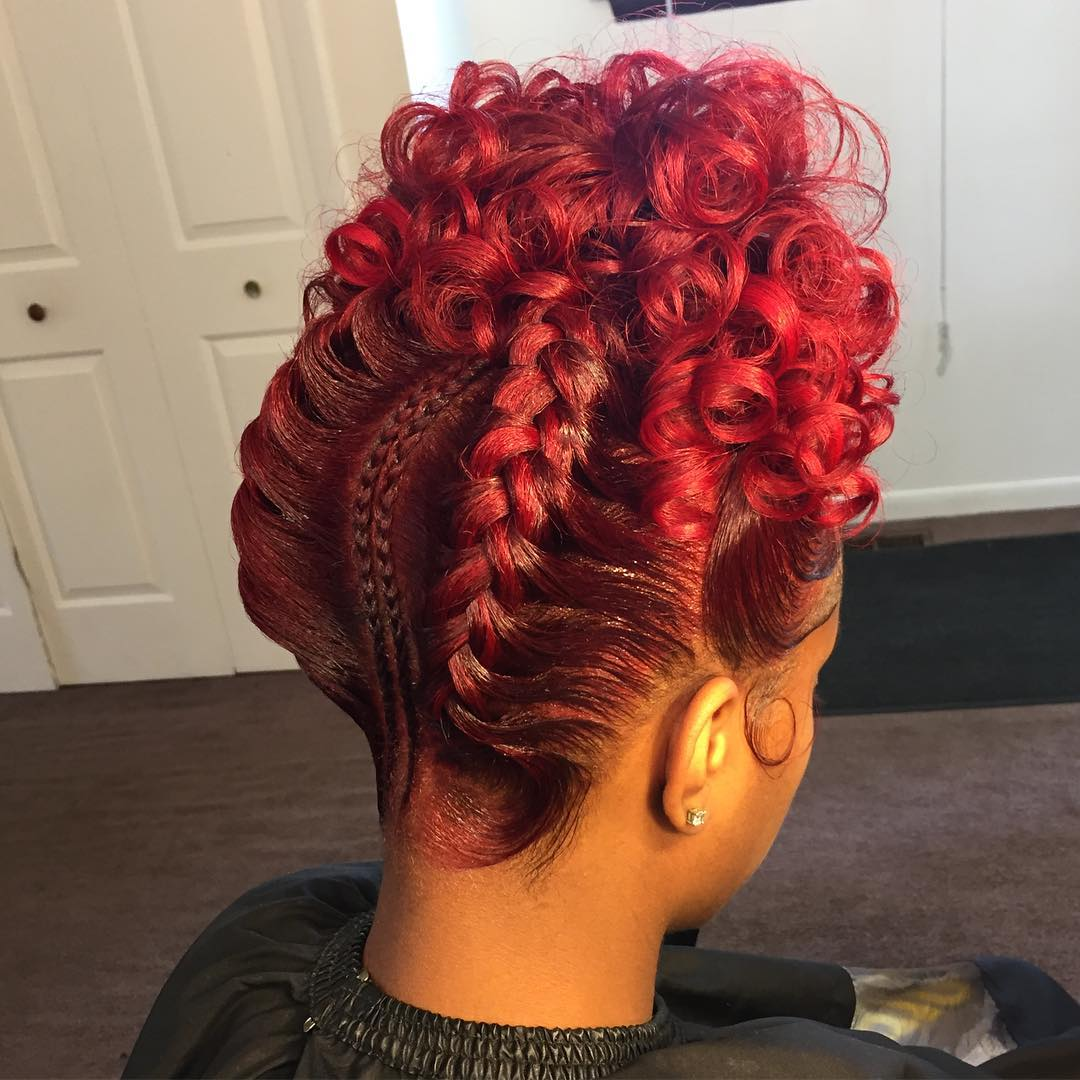
Image by @thehairqueen via Instagram
Why not style your hair in a curly updo for a more excellent look? Depending on what works best for you, this hairstyle can be worn with weave or natural hair.
Each braid builds anticipation for the big event, the perfectly coiffed eruption of curls at the top of the head.
Method 10- Cornrows and six Feed-In Goddess Braids
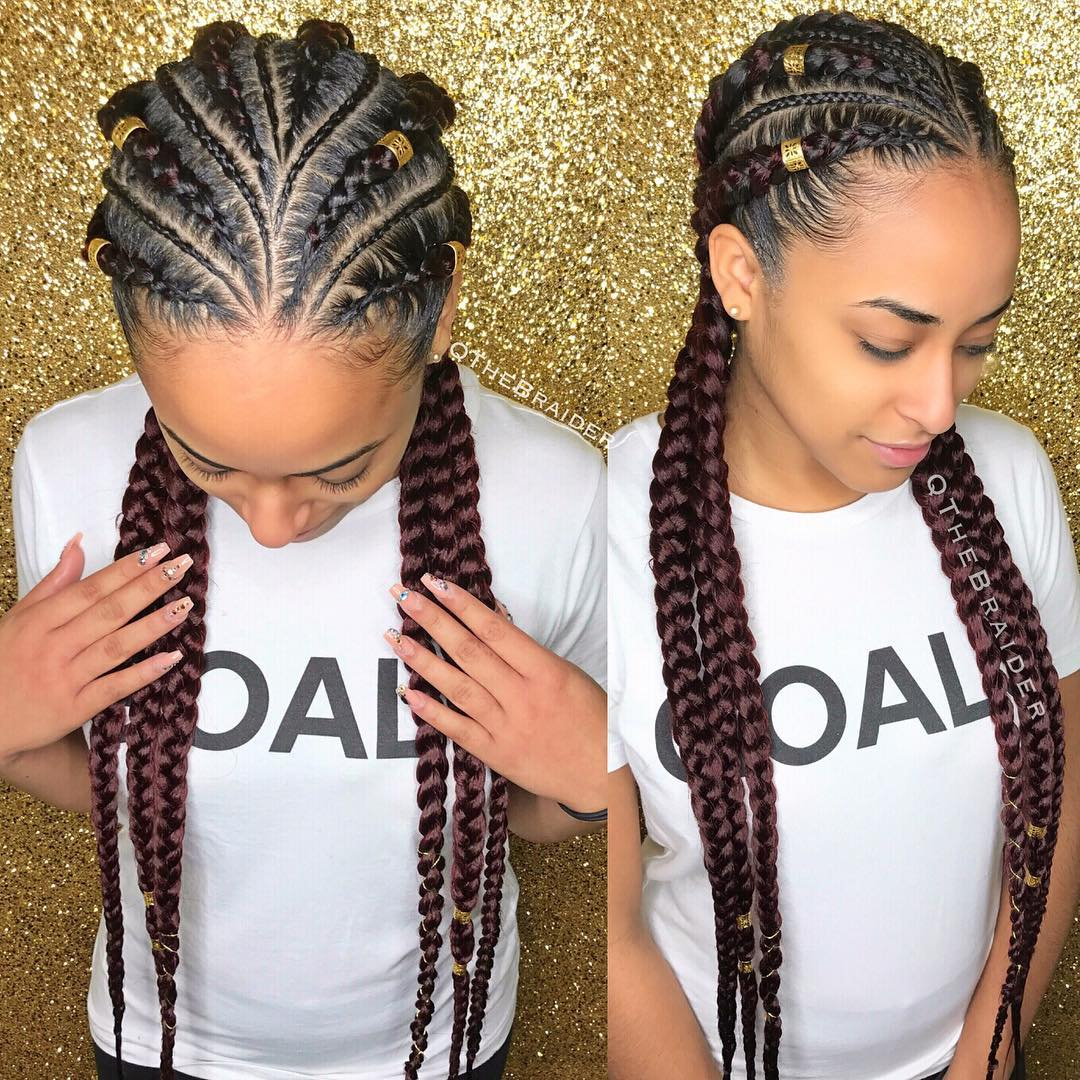
Image by @shaylastyles_ via Instagram
You’ll like the notion of these dark-maroon branching braids with gold hair cuffs and braid thread if you like huge braids.
The outcome is a distinctive hairdo you’ll enjoy wearing for a long, with two goddess braids branching out from the imagined center parting on each side and in the middle.
Method 11- Mohawk with four goddess braids
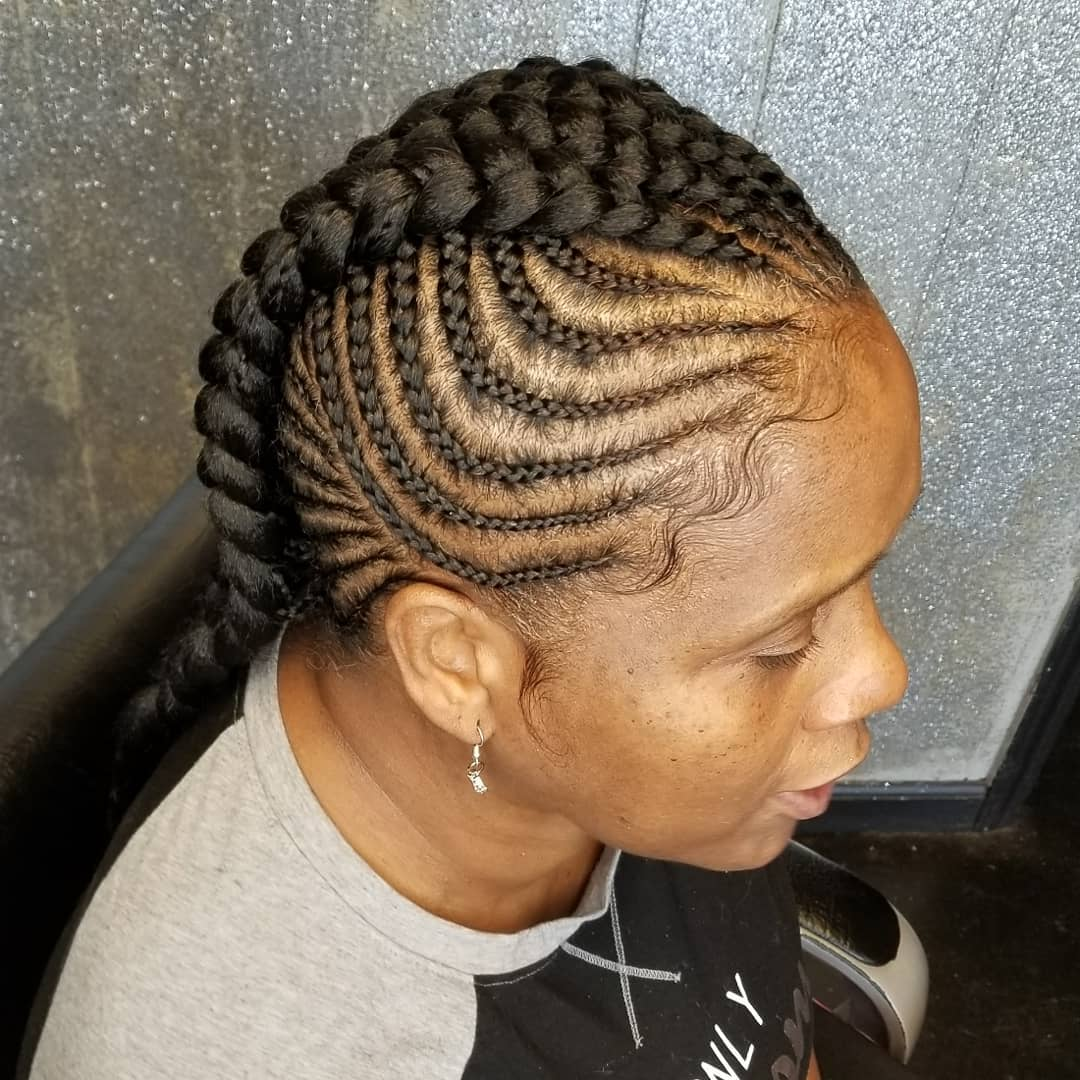
Image by @shaylastyles_ via Instagram
A lovely Mohawk may be created using four goddess braids. Let them be thick to contrast with the thin cornrows on the sides. It gives off the look of an athletic, slightly tomboyish mohawk.
Keep In Mind
- Complex and Detailed: These braids require intricate styling, so be prepared for a more extended hairstyling session.
- Protective Styling: Goddess Braids serve as a protective style, helping to shield your natural hair from environmental factors and reduce damage.
- Comfort and Maintenance: Ensure your braids are not too tight to avoid discomfort and scalp tension and follow a maintenance routine to keep them looking fresh.
- Personalization: While traditional styles exist, there’s room for personalization with different patterns, accessories, and sizes to express your style.
Method 12- Goddess Braids of Various Sizes Bun
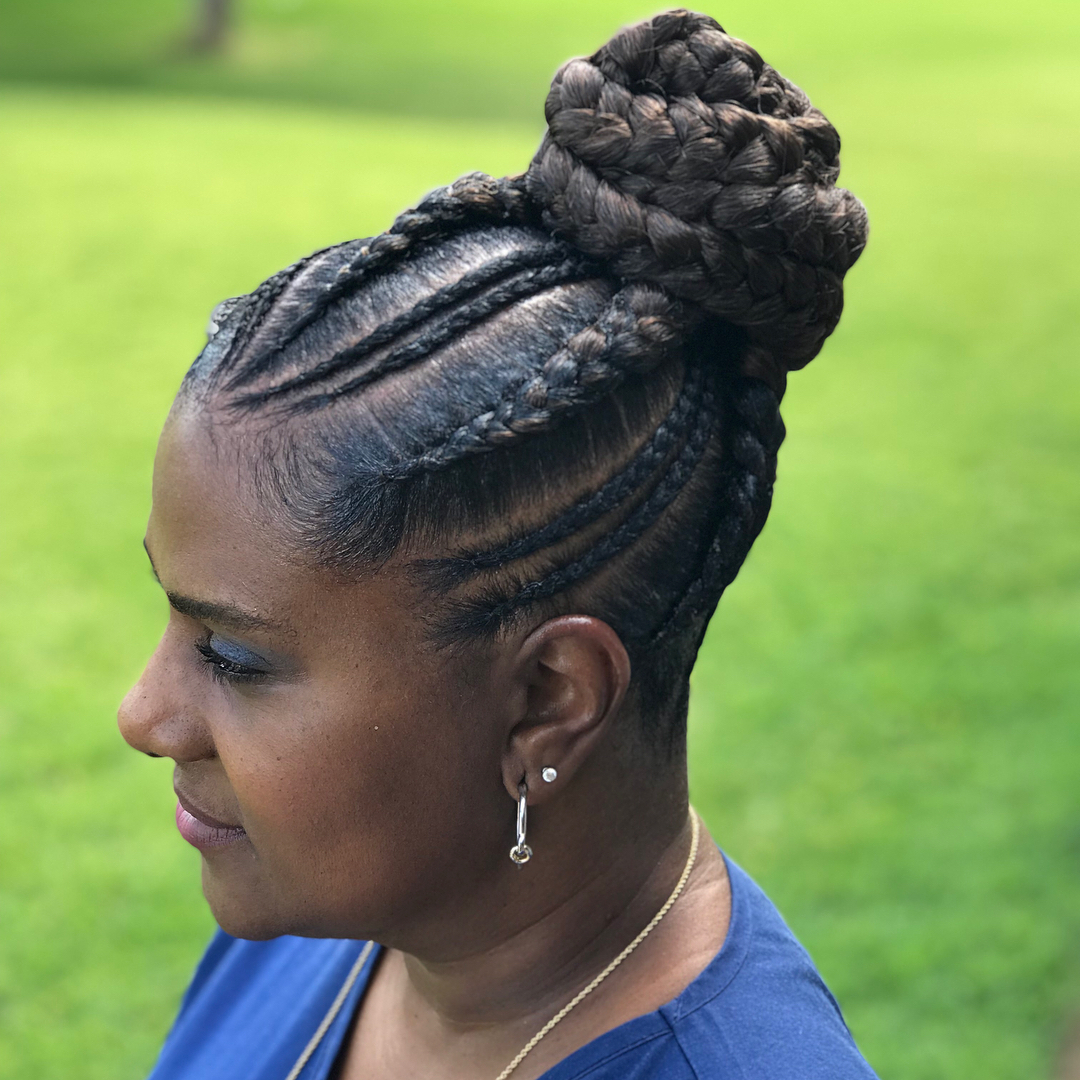
Image by @donebyjenn via Instagram
This braiding pattern’s distinctive and refined features include a succession of braids of various sizes that branch off from a single point.
They swoop and curl around the head before being tied into a lovely bun with a top knot.
Method 13- Enormous goddess braids
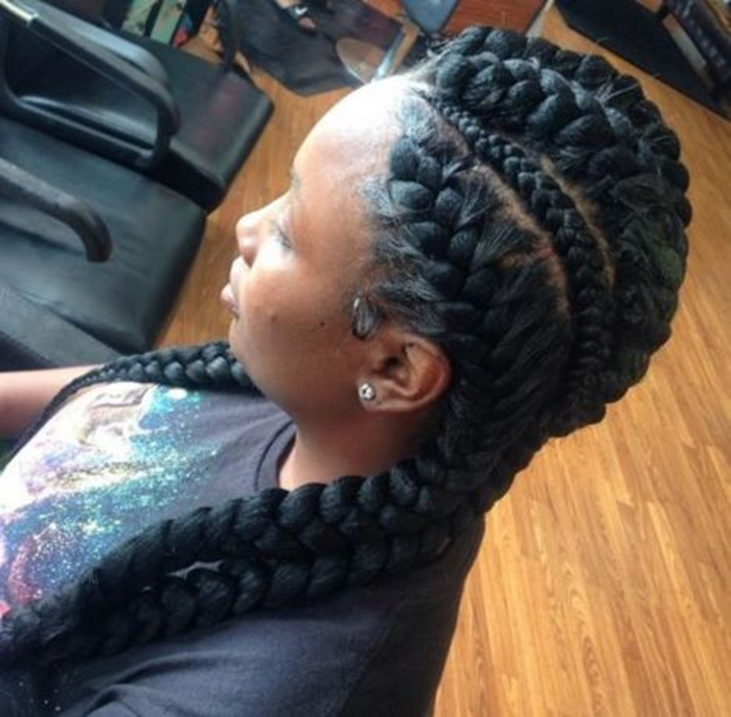
Image by @therighthairstyles via Instagram
Changing up the thickness of your braids is undoubtedly one of the best methods to achieve a stunning, unplanned look.
African goddess braids put hair on a new playing field, from lean to downright obese.
Method 14- Goddess Curled Braids
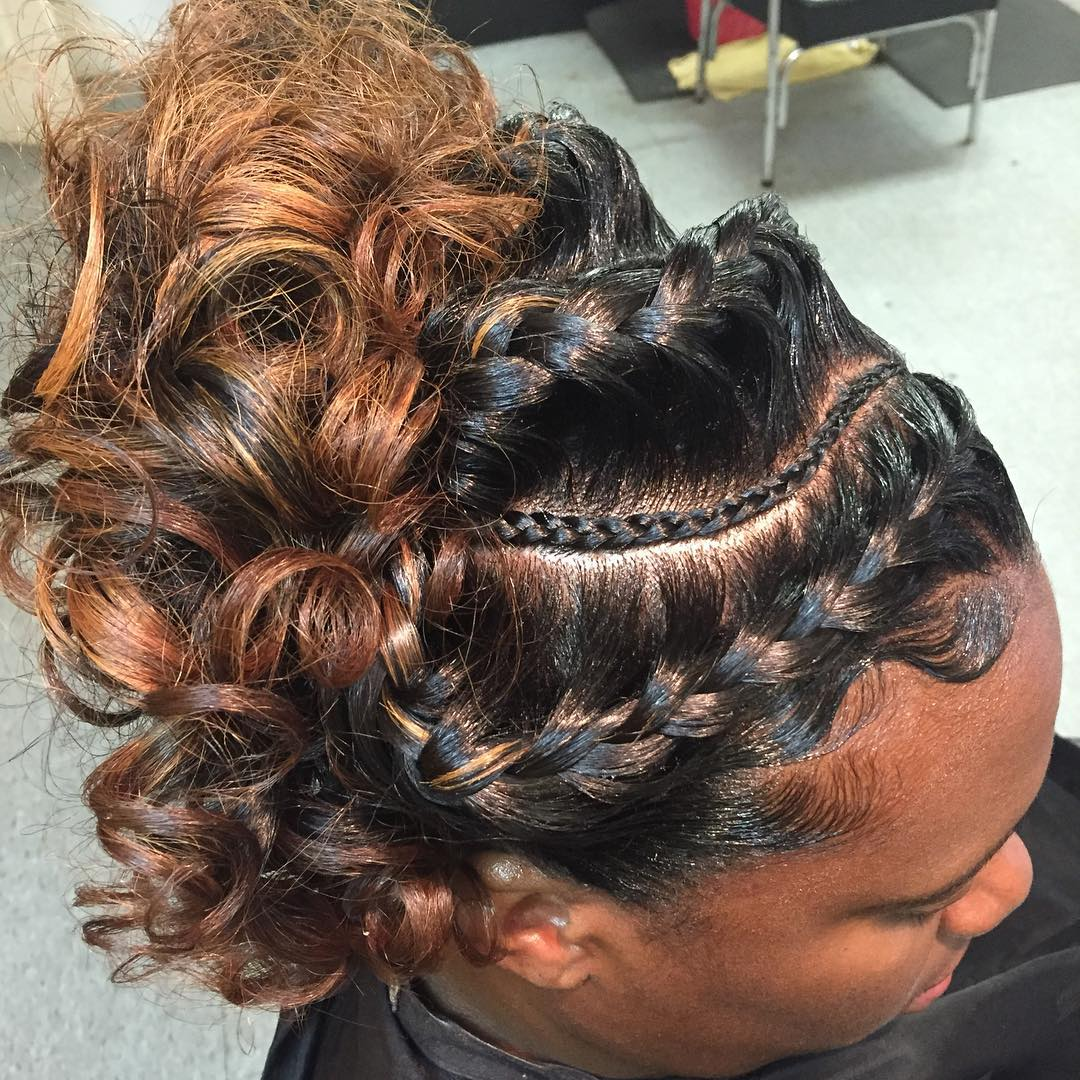
Image by @thehairqueen via Instagram
Thicker and thicker braids and a curly rear region make up the gorgeous curly goddess braid styles.
Try this look at home and have your salon hairdresser expertly replicate it. Simple braiding steps include:
- Beginning with a medium-thick braid along the hairline.
- Adding a thin braid across the middle of the head.
- Concluding with a thicker, looser braid closer to the crown.
As you add curls to the remaining hair, gather it together and secure it with bobby pins.
Method 15- Extra-Large Goddess Braids Bun
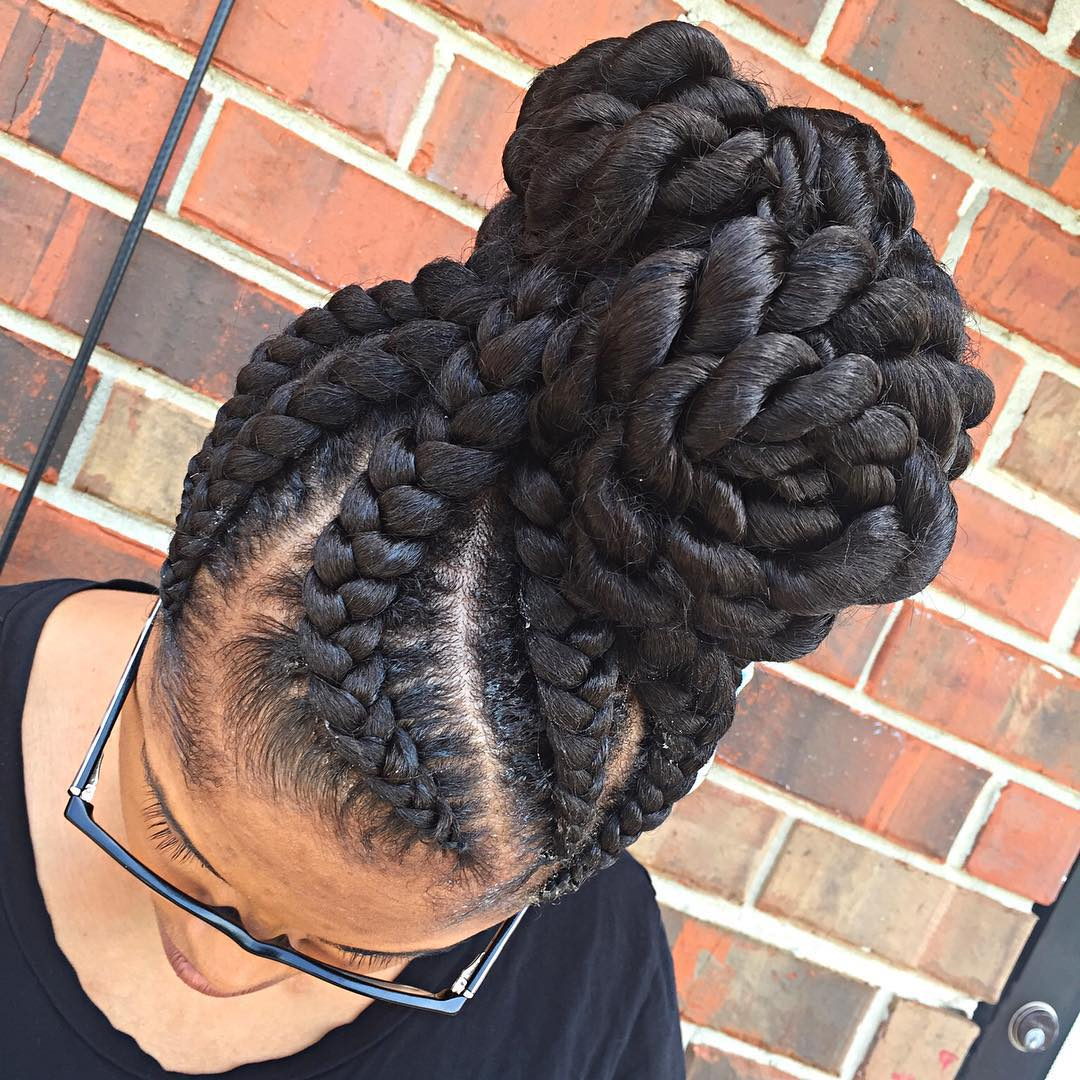
Image by @art_of_beautification via Instagram
The only option for updo hairstyles is to go big or go home. Pulling off a massive, bold bun may be particularly difficult, but when it does, it indeed does.
Method 16- Massive Goddess of Halo braid
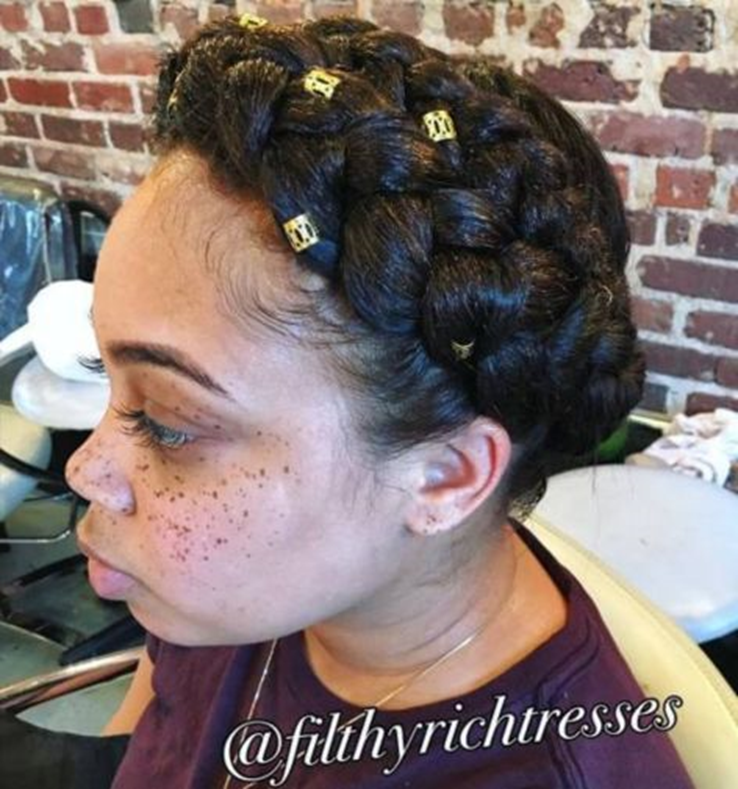
Image by @therighthairstyles via Instagram
Your head will be crowned, your face will be framed, and you will appear incredibly gorgeous with thick African goddess braids wrapped around.
Add some jewelry or beads to your hair to dress it up even more.
Method 17- Updo with Inverted Goddess Braids
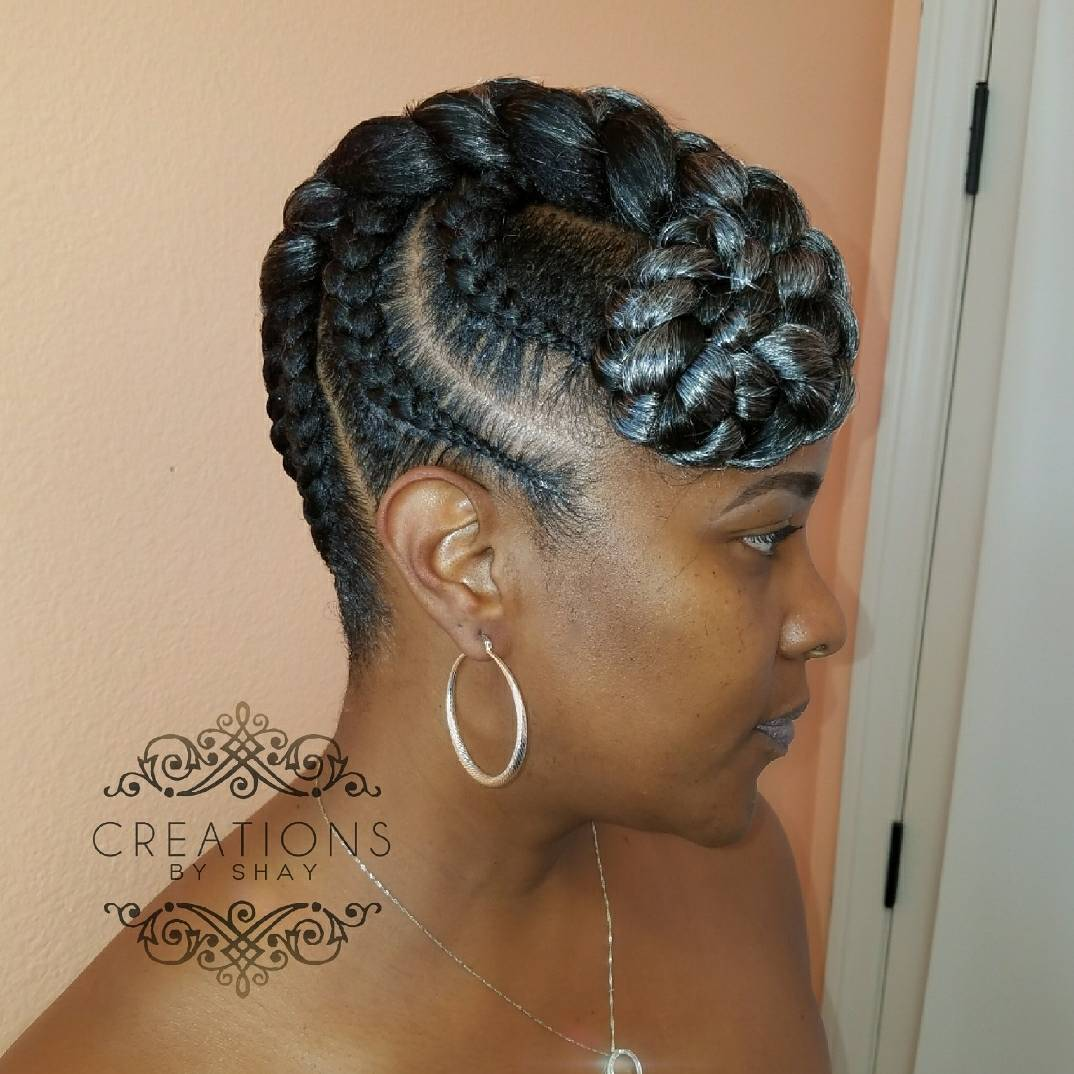
Image by @tressybestie via Instagram
Are you leaving for a night in the town? Here is an example of an updo that few women can resist.
Adding a glitzy touch to your updo is simple by using extensions of a shiny shade comparable to your natural color yet stands out. You can also support it with the colors in your makeup.
Pro Tip
To maintain neat and long-lasting Goddess Braids, moisturize your scalp regularly with natural oils like jojoba or coconut oil, ensuring a comfortable and healthy protective style.
Method 18- Three smaller plaited goddess braids
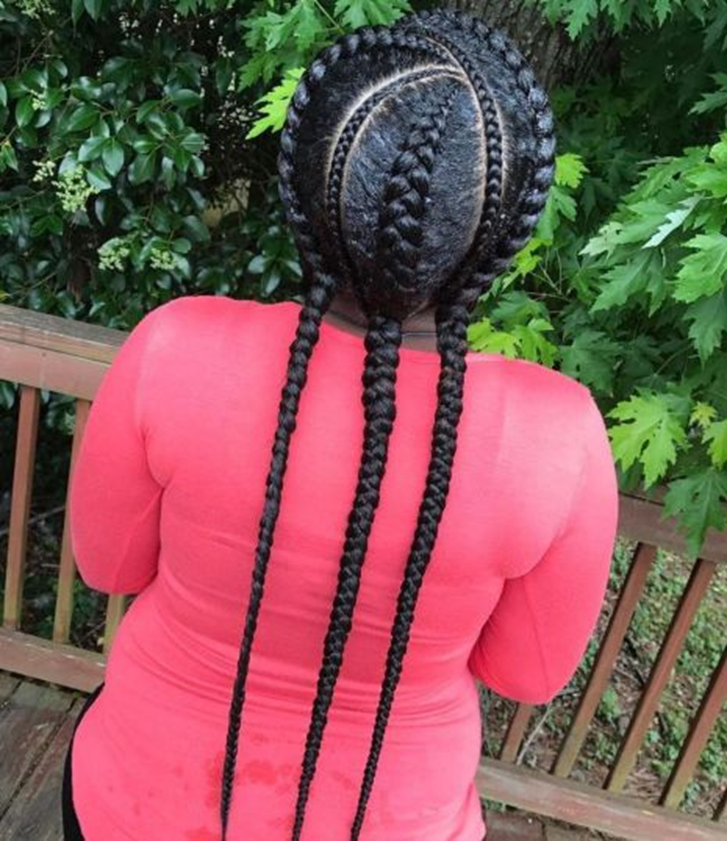
Image by @therighthairstyles via Instagram
Bigger goddess braids look great with smaller ones. This hairstyle combines a simple, elegant appearance.
If you want to look more put together, you can wear those braids loosely hanging or twist and pin them into a low bun.
Method 19- Low pigtails and Goddess Braids
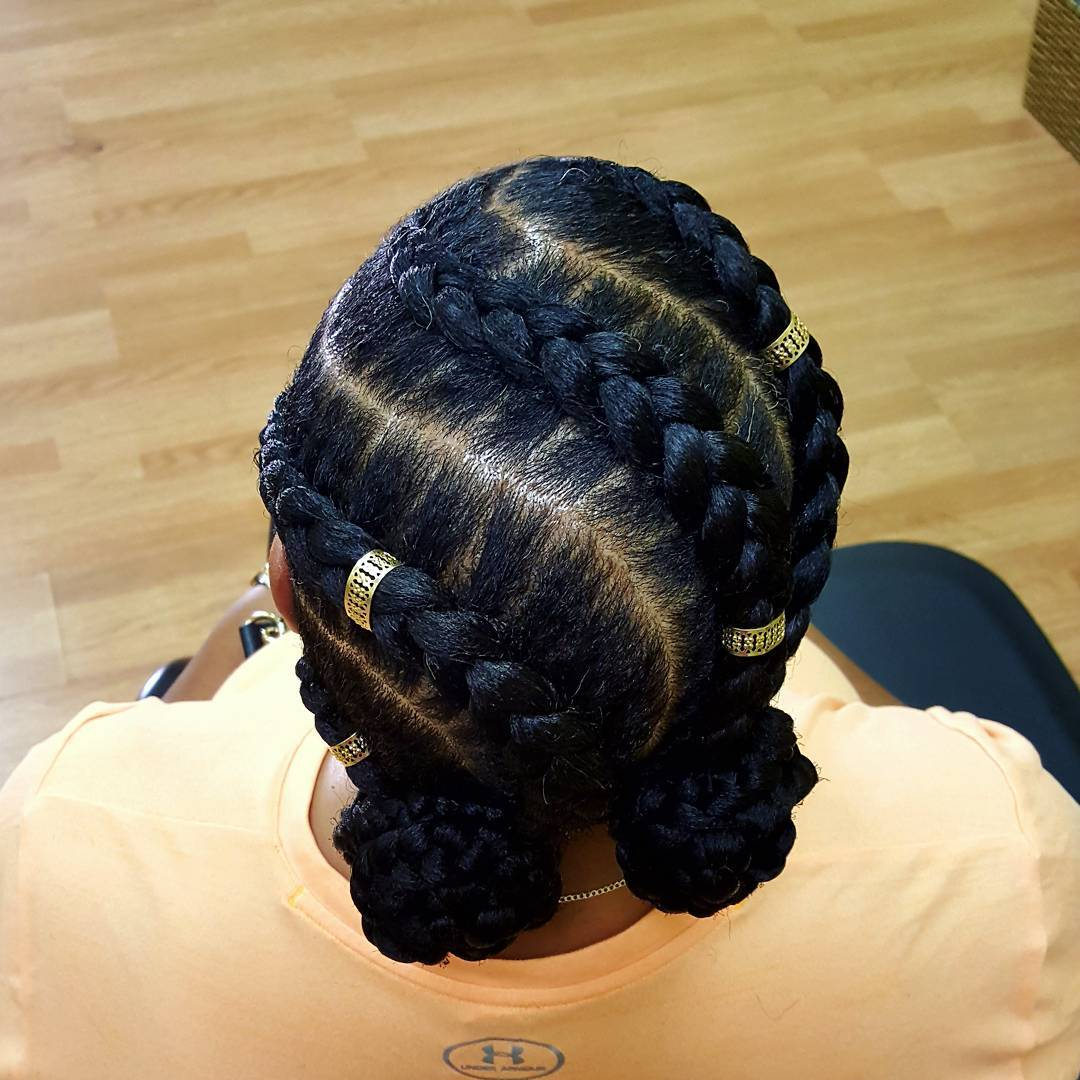
Image by @marlyshairbraiding via Instagram
Large diagonal braids always appear more intriguing than ones that run rearward straight.
At the nape of your neck, you can finish two braids with little buns; as you can see, it looks stunning.
The braids’ sleekness is perfect, and the golden clips around them give them an air of luxury and sparkle.
Method 20- Goddess Braids in a “S” shape
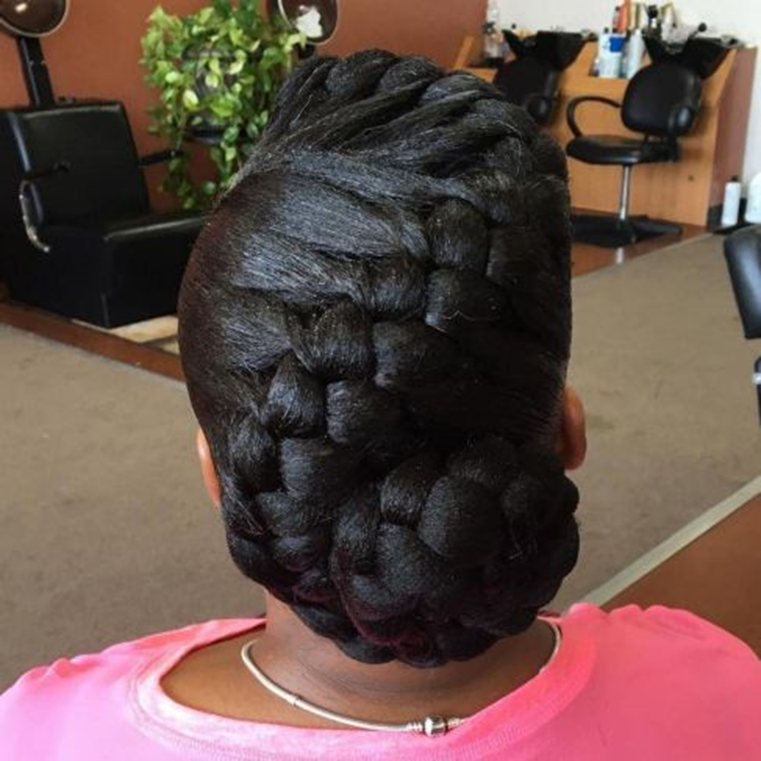
Image by @sexychocolatemama via Instagram
You may have just discovered how to create a jumbo braid that is fashionable and current. This look is fantastic because there is only one massive braid in use.
The thick snake braid has a sensual, feminine vibe. It is definitely on point to end it with a bun.
Method 21- Braided Greek Goddess Crown
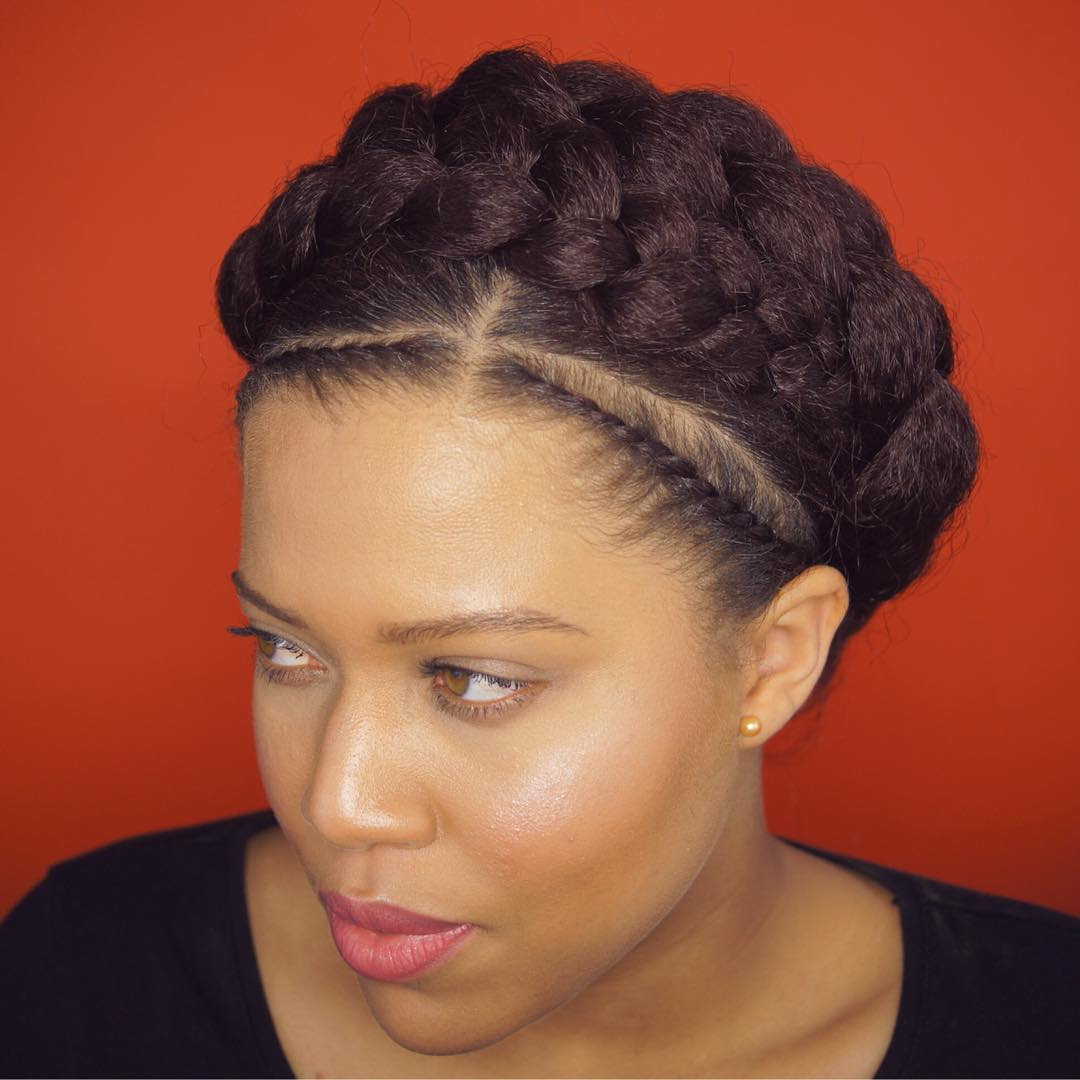
Image by @samanthapollacl via Instagram
You might discover this is your favorite image from the gallery you’ve browsed. A classy night-ready style will always be double goddess braids.
Remember to add a few more minor twists or braids to the mixture to spice things up.
Method 22- Beautiful Corset Goddess Braids
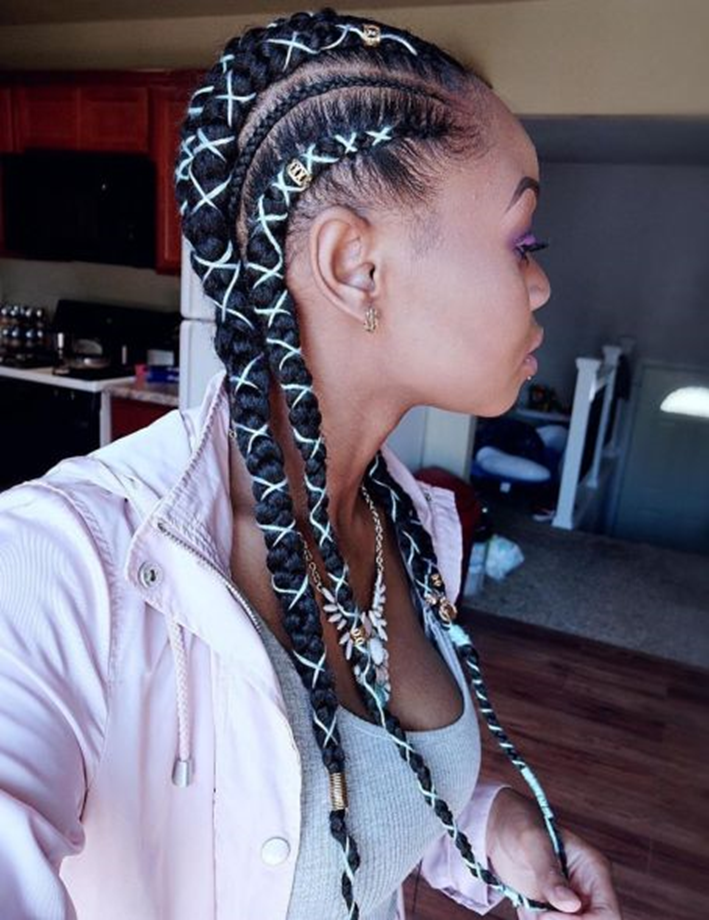
Image by @therighthairstyles via Instagram
The corset braid style has become significantly more popular. There’s a reason for it; it’s a varied style that will truly make you stand out.
To make the tiny goddess braids stand out, crisscross two different bands over them.
Fun Fact
Goddess braids, also known as Fulani braids, are inspired by the Fulani ethnic group in West Africa. These intricate and stylish braids are a fusion of cultural heritage and contemporary fashion, often adorned with beads and accessories for added flair.
Method 23- Purple extensions with Goddess Braids
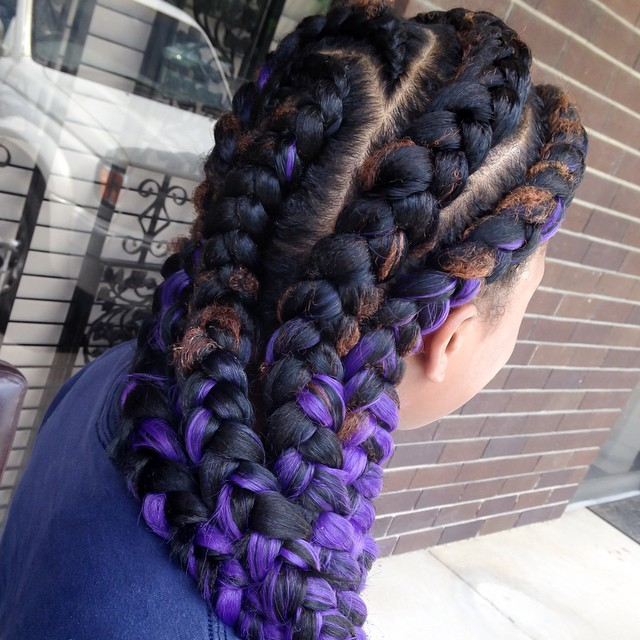
Image by @natural_zvibez via Instagram
The capacity of dark hair to support intensely vivid accent colors in goddess hairstyles is a significant benefit. A bold purple, a lovely caramel blonde, or both might be worth a try.
You may create your own look by adding colored flecks to your braids. The most durable and brilliant color will be permanent, although modern hair chalks and temporary paints can have a lot of punch.
Method 24- Combination Snake and Fishtail Goddess Braid
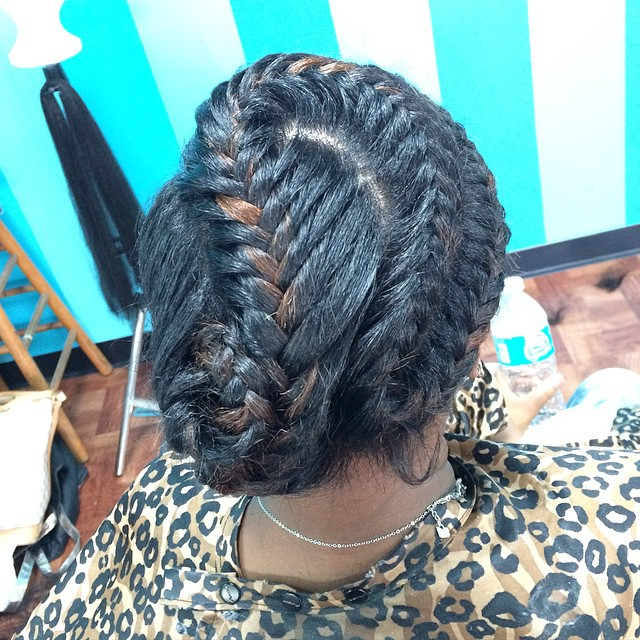
Image by @tiffanyyyy_j via Instagram
Curve, jag, or twist your strands to create fresh, gorgeously inventive looks. You will enjoy having hair that is difficult to match, and on hot summer days, it will keep everything up and out of the way.
Top Tips
Choose Your Braiding Hair Wisely
The appearance and texture of your braids are going to be pretty consistent for the next few weeks, so get it right.
It’s almost sad that so many women of color choose silky extension hair over more natural textures that emulate their own hair.
Your hair is beautiful. Yes, yours. Your hair is beautiful and you are too, so don’t be afraid (or even ashamed) to choose hair that looks like your natural hair.
The best Goddess braids in our opinion are ones that look really natural and give an old-world charm that’s both feminine and strong.
If you want silkier neat braids, that’s OK, we’re just advising that you think twice rather than automatically reaching for the hair that looks most like Jennifer Anniston’s.
Go Big Or Go Home
If it’s your first time doing Goddess Locs then make them bigger than the ones you have seen in the videos. Why? Because while you’re still learning, it’s going to take you a really long time to get them done perfectly.
If they’re bigger, then you’ve got bigger sections to work between your fingers, so your fingers won’t get tired as quickly and you can feel what you’re doing better. Don’t be hard on yourself by making your job harder, just go big.
Glue The Ends
To finish each braid, you should take the wispy end of your real hair, or braiding hair, depending on how much longer you’ve gone than your natural length, and make a loop as if you’re going to knot it.
Before you do, add your hair glue or super glue so when you pull it tight, it’s going to stay there. These braids take forever so you really don’t want them coming undone and unraveling your hard work.
Final Thoughts
If you are determined to try Goddess Braids at home on yourself, then make sure you have everything you need before you start and go slow.
Be prepared for a long process but a worthwhile one. If you can get your Goddess Locs done by a professional, you should, but either way, you’ll be totally blown away with the results.
Goddess Braids are here to stay in style and we can totally see why. They look good on just about anyone with any length or texture of hair which is no small thing.
We just love the bohemian look of these braids which look cool, yet neat at the same time. It’s magical.

- 31 Soft Locs & Distressed Faux Loc Hairstyle Ideas For Revolutionizing Texture And Messy Marvels In 2025 - December 4, 2023
- 45 Faux Locs Styles For Black Women: The Ultimate Inspiration In 2025 - December 3, 2023
- 65 Fun and Flirty Two-Strand Twist Hairstyles To Achieve Confidence In 2025 - November 28, 2023