
- The butterfly braid is a stunning and intricate hairstyle that combines practicality with a touch of elegance.
- This braid offers versatility, allowing you to adapt it to various occasions, from casual to formal events.
- Ensure your hair is clean, dry, and tangle-free before starting the butterfly braid for a polished look.
- Divide your hair into precise sections to maintain a neat and symmetrical appearance.
- Keep your braid tight and secure throughout the process to prevent unraveling.
The butterfly braid, an enchanting and intricate hairstyle, evokes the delicate grace of its namesake insect.
This captivating braiding technique weaves a mesmerizing pattern reminiscent of butterfly wings, making it a unique and visually stunning option for various occasions.
As strands cascade and interlace, the butterfly braid showcases an artful blend of elegance and creativity that captures attention and admiration.
Before You Get Started
- Ensure your hair is clean, well-moisturized, and free from tangles before attempting the butterfly braid to achieve a polished look.
- Gather all necessary tools, including hair elastics, clips, and a fine-tooth comb, to make the braiding process smooth.
- Take your time to create an even and clean hair parting for a well-structured butterfly braid.
- Consider the size of your braid, as it will determine the final style’s impact and the time required for the braiding process.
- Maintain a comfortable braid tension throughout the process to prevent excessive pulling on your scalp and hair.
With its charming allure, the butterfly braid offers a canvas for personal expression.
Whether adorning a casual day out, adding a whimsical touch to a special event, or even being the centerpiece of a bride’s ensemble, the butterfly braid’s versatility knows no bounds.
Creating this masterpiece involves artful intertwining and strategically dropping strands, resulting in a breathtaking visual effect.
Dive into the butterfly braid, where beauty takes flight through braids, offering a touch of nature’s elegance in a captivating hairstyle.
Butterfly braids are an awesome and visually distinctive choice for your hair that will give a unique look that others are sure to ask you about.
You may have heard of a butterfly braid before, but with so many different choices and styles for your hair, you might not be completely sure exactly what it means.

This article is here to take you through each step of butterfly braiding, including what exactly a butterfly braid looks like and two different techniques with step-by-step guides on how to do them.
We’ve also included a handy FAQ section to walk you through some of the most important questions you may have.
What Is A Butterfly Braid?
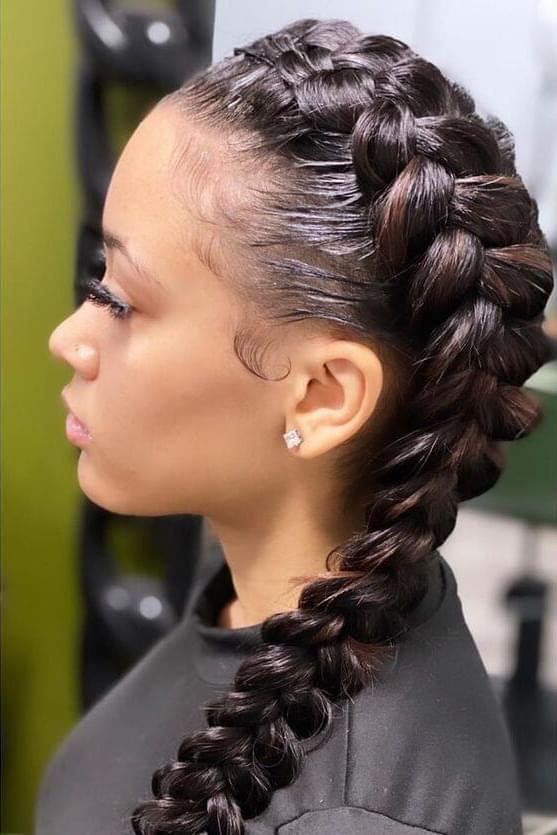
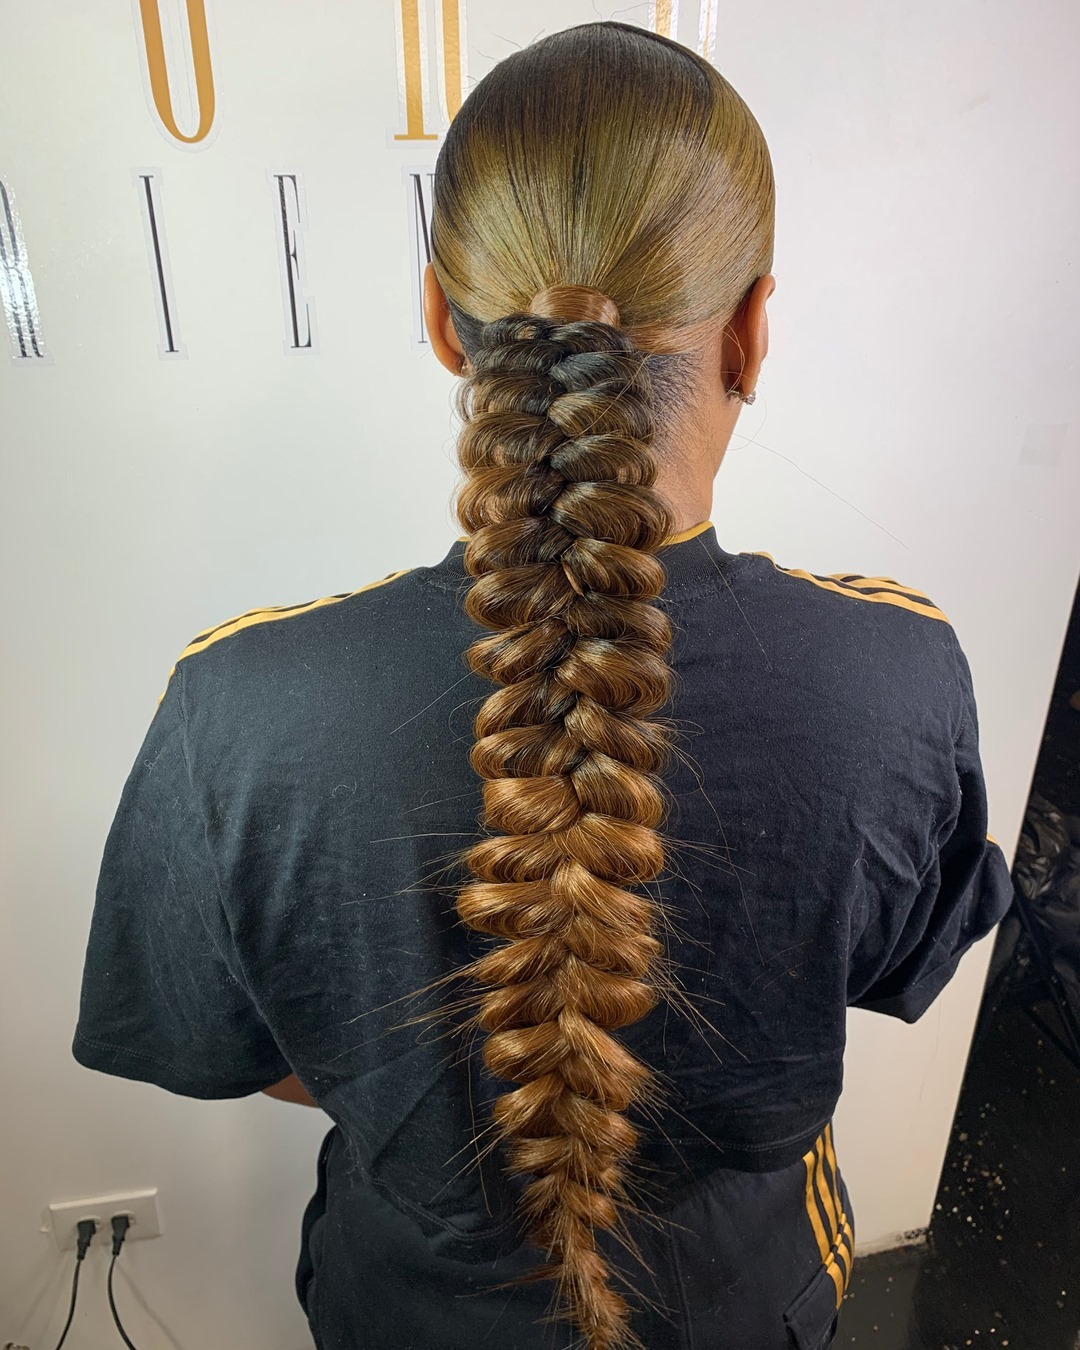
First, we need to learn exactly what a butterfly braid is. A butterfly braid is made from two big braidings on each side of the head that meet together into one single braid at the back of your head.
If braided well and looked after, butterfly braids are likely to last for 3-6 weeks.
It’s important to note here that a butterfly braid is not the same thing as the modern braiding style in which your hair is braided at the back to look like a bow-shaped butterfly.
Although these two styles sometimes have the same name, they are separate styles.
Quick Guide to Crafting the Perfect Butterfly Braid
- Elegant Hair Style: Butterfly braids offer a sleek, eye-catching look suitable for various occasions.
- Control: Keep a gentle tension while braiding to prevent discomfort and stress on your scalp.
- Easy Maintenance: Butterfly braids are relatively low-maintenance; a simple moisturizing routine and occasional touch-ups maintain their look.
- Styling Versatility: Explore different ways to style your butterfly braid, from updos to ponytails, to keep your look fresh and versatile.
How Do I Create A Butterfly Braid?
Technique 1 – Sewing
You start by separating your hair into two sections. It’s important to leave at least a few locks at your crown so that you will be able to attach your braiding hair.
After this, attach your braid and create one long, loose braid. Braid this hair all the way down, depending on how long you want it to be.
Next up you will do the exact same thing but on the other side of your crown.
Pro Tip
Secure the butterfly braid with an elastic band or clip before starting, keeping it in place as you work on the braid for a neater result.
We recommend making your braid the same length as your first one so that it will be easier to connect and look more even.
We recommend leaving a little bit of loose hair at the back so that you can connect them easier. You can add color to your braid at this time if you like.
Here you will want to use a needle and thread to attach the loose braids.
Now you will want to use that loose bit of hair at the back of one of your braids to connect the two together.
You will braid the loose hair onto the woven braid and braid all the way down until you run out of hair.
This is a great technique that will give you thick, strong butterfly braids that are sure to last for quite some time.
Keep In Mind
- Hair Condition: Start with clean, well-moisturized hair, as this provides a smooth foundation for the butterfly braid.
- Precision Parting: Create a clean and even parting to ensure the butterfly braid’s symmetrical and polished appearance.
- Braid Size Choice: Decide on the size of your butterfly braid to match the desired style and the time you’re willing to invest.
- Tension Awareness: Be mindful of maintaining a comfortable braid tension to prevent excessive pulling on your scalp.
- Routine Maintenance: Regularly moisturize your scalp and address any frizz or flyaways to keep your butterfly braid looking its best.
Technique 2 – Pin

With this technique, you will be able to attach your crochet hair without having to sew it in as with the previous section.
First, you want to make two short braids on your crown with your own hair – with one side larger than the other which will end where your hair parts.
Next, you will want to get your crochet hair and part it in two. Now you will take hair from the middle and add it to each side so that it will be even when you braid it.
This is the part that can be the biggest pain, so take your time and make sure you get each side even.
Once it’s even you can start to braid it loosely – and keep in mind that you have not yet attached it to your crown, this can all be done in your hands.
Next up is to pin the entire crochet braid onto the larger braid on your own head that you made earlier. You can pin it by using bobby pins – take your time here and make sure that it’s properly attached and even to your crown.
Now that one side of the crochet hair is attached to your head, you can start working on the other.
Make sure that the bobby pins you’re using embed deep into the braid that’s underside your crotchet braid.
Once both sides are on you can begin to braid them together. Providing you braided them loose enough to begin with, it should be easy to begin connecting the two together.
This is a great technique if you’re looking to easily remove your braids.
Sewing braids on can be difficult to remove quickly so if you want some braids just for one night then this is the technique for you!
Final Thoughts
These are just two of the most basic ways you can create awesome butterfly braids that look for good on a variety of different occasions.
We hope that by showing you a way in which you can pin and a way in which you can sew gives you enough variety for whichever version you were looking for.
Below is a short FAQ section to answer some of the more common questions about butterfly braids.
Happy braiding!
Did You Know?
The butterfly braid, also known as the “butterfly cornrow” or “ribbon braid,” is a versatile and eye-catching style that combines elements of traditional cornrows with unique weaving techniques, resulting in a visually stunning braid pattern. It’s a popular choice for those looking to make a statement with their hair.

- 31 Soft Locs & Distressed Faux Loc Hairstyle Ideas For Revolutionizing Texture And Messy Marvels In 2025 - December 4, 2023
- 45 Faux Locs Styles For Black Women: The Ultimate Inspiration In 2025 - December 3, 2023
- 65 Fun and Flirty Two-Strand Twist Hairstyles To Achieve Confidence In 2025 - November 28, 2023