
- Select a hair-highlighting shade that complements your dark hair color and skin tone for a more natural look.
- Decide whether you want balayage (hand-painted) or foil highlights; balayage provides a softer, sun-kissed effect, while foil highlights offer a more defined contrast.
- Gather all the necessary supplies and tools, including hair dye, developer, brushes, and foils, to ensure a smooth DIY process.
- Always perform a strand test first to check how the hair dye reacts with your hair and to determine the processing time.
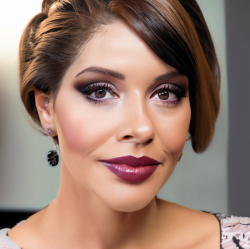
If you have dark hair and are looking for a way to make it more multi-dimensional then you should definitely consider highlights.

Highlights are a great way to switch up your dark hair without causing too much damage.
Highlights are also a great way to accentuate your hair cut and draw attention to the shape of your hair.
The problem with highlights is that going back and forth to the hair salon to get them done can be very expensive.
But if you are handy with a paintbrush and you have the patience to learn the right process, you are able to do your own DIY highlights at home without needing to go to the salon.
We have put together this full guide to help you get perfect salon quality highlights on your dark hair from the comfort of your own home, saving you money and the hassle of having to book an appointment.
Before You Get Started
- Ensure your hair is well-moisturized and in good condition before adding highlights to prevent excessive dryness and damage.
- Always perform a skin patch test with your chosen highlighting product to check for any allergic reactions or sensitivities.
- Precisely divide your hair into sections for an even and balanced application of highlights.
- Select a highlighting shade that complements your dark hair color and matches your desired outcome.
- DIY highlighting can be a meticulous process, so take your time to achieve the best results, and seek help from a friend if needed.
The highlighting technique we have used is called ‘Balayage’. It is a french hair dying technique which involves hand-painting the highlights to create a more natural effect that will look like your hair has been kissed by the sun.
Not only is this effect able to be achieved at home, it looks much better than chunky highlights and is very on trend.
It is worth noting that this guide has been designed to be used on naturally dark hair – if your hair has been dyed dark or you have a lot of gray hair in amongst your dark hair then the results could vary.
It might be better to go to a salon and get your highlights done by a professional in that case.
Choosing Your Color

The first thing you need to do is decide what color you want your highlights to be. There are lots of different options for shade and tone, so you need to think about what look you are trying to achieve.
You should also pay attention to the natural tones in your hair and choose a highlight that will complement these rather than clash.
If you want something subtle without being too drastic then you could go for a nice warm caramel color on just the mid lengths and ends.
If you want to make more of a statement then you could try a full head of golden highlights which will be more of a transformation from your normal hair color.
If your hair has natural cool shades then you might want to go for an ashy shade of blonde rather than a warm shade.
There are lots of different options to consider, but you also need to take into account your complexion and which colors will wash you out and which will make your eyes pop.
If you space the highlights out it will make more of a subtle look, but if you pack them in tightly it will be a more drastic change.
If you are unsure of what color to choose, you could try downloading a color changing app where you upload a photograph of yourself and the app changes the color of your hair.
This will allow you to see what color will suit you before you commit to dying your hair.
Getting The Right Products

Before you start the process of DIY highlights, you need to make sure that you have all of the right products and equipment.
This depends on which color you have chosen. If your highlights are dark red or medium brown then you will be able to add them into your hair in one step using only the box dye.
If your hair is damaged or over-processed, avoiding harsh chemicals and opting for gentler options is best.
Select a hair color that complements your skin tone and matches your desired results. Look for product reviews online to see how other users have experienced the product.
Research the brand’s reputation and quality. If you need more clarification, consult the color chart on the product packaging or seek professional advice.
Always follow the instructions provided in the product packaging. Remember that hair color results can vary based on your hair’s natural color, texture, and porosity.
If you’re uncertain or want to make a significant change, seeking professional guidance is recommended to achieve the best outcome while maintaining the health of your hair.
If your highlights are lighter than this it will involve multiple steps and a few other products.
Hair Dye
If you are using a box dye then it is recommended to use one that is specifically designed for dark hair.
This will ensure that the final result will be a rich, vibrant color that stands out against your dark hair.
The box should include a before and after example for a few different shades of hair, so make sure you are happy with how it will turn out before you buy the box dye.
If the change will not be drastic enough for you then choose a different color.
There are certain brands of box dye that design products specifically for dark hair.
These include Schwarzkopf Live Color Xxl Hd Intense Color, L’Oreal Paris Superior Preference Ombre Touch, Garnier Nutrisse Nourishing Multi-Lights Highlighting Kit, and the L’Oreal Paris Superior Preference Fade-Defying Color + Shine System.
Remember that these products are designed for hair that is naturally dark in color – results may vary if your hair is dyed dark.
Hair-Lightening Kit
The other option is to use a hair-lightening kit. They are widely available from beauty stores, drug stores, and online.
These kits come with everything you need to get your hair golden blonde. Including bleach.
A hair lightening kit is a product designed to help you achieve lighter hair shades by lifting your hair’s natural or existing color.
These kits typically contain the necessary ingredients and tools to lighten your hair, such as a lightening powder, developer, gloves, and sometimes a brush or applicator.
Hair lightening kits create highlights, balayage, ombre effects, or all-over lighting.
If you try to add a blonde color to dark brown hair then it may not show up- you need to lighten the hair to allow the blonde hair color to be visible.
Some hair dyes that lighten hair will contain an element of bleach mixed in with the color.
Bleaching and coloring in one step can sometimes cause unpredictable results.
Hair lightening kits include bleach and a separate special kind of dye called toner, which allows you to get your hair the exact shade that you are looking for.
Quick DIY Guide: Adding Highlights to Dark Hair at Home
- Product : Choose a DIY highlighting kit suitable for dark hair to achieve your desired shade and effect.
- Sectioning Precision: Neatly separate your hair into sections for even and professional-looking highlights.
- Maintenance: After highlighting, use color-safe products and deep condition your hair regularly.
- Touch-ups: Plan for touch-up sessions to refresh your highlights and keep them looking polished and attractive.
When you are using bleach it is important to note that it comes in different strengths.
The ‘volume’ of the bleach refers to its strength, and the stronger the bleach the lighter your hair will be, so you can choose the bleach based on how light you want your hair to be.
If you want to end up with a golden or an ashy blonde then you should use a 30-volume developer. If you are not looking to lift that much color then you could go with a 20 volume developer.
There are lots of good quality hair-lightening kits available to buy, but the best ones are The Manic Panic Flash Lightening 30 Volume Bleach Kit or the Blond Brilliance Highlighting Kit.
Both kits use powder lightener and a creme developer.
Toner And Developer
Using a toner and a developer is an optional step, but it can make all the difference when it comes to DIY highlights. They can help you to get a more precise color and salon quality finish.
The toner does not change the whole color of your hair, but adjusts the undertones to create a more even and desirable shade. Toner is the perfect way to get your hair from a brassy blonde to a silvery blonde.
In order to use toner correctly, it needs to be mixed with a developer.
You should choose your toner after you have chosen your hair dye, to make sure that you choose the right shade of toner. It is especially important to choose the right toner if you are using bleach.
Toner is very affordable and is available from most beauty stores. Developer is even cheaper than toner and is also available from beauty stores.
Make sure you use a low volume developer like volume five, and don’t use a developer with a volume higher than 10.
Mixing Bowl

When you use the balayage technique to add highlights into your hair, you will need to hand paint them on. This means that the dye needs to be mixed in a bowl so you can dip your brush into it.
Whatever method you choose, you will need a container to hold your dye so you can dip your brush in it.
You don’t necessarily need to buy anything new – you can use an old plastic container or a glazed ceramic bowl.
However, hair dye and bleach contains some harmful toxic chemicals so make sure you use something that you won’t need to eat out of again.
If you would rather get yourself a bowl to use specifically for hair dye, you could get yourself a bowl from a beauty store or a simple plastic bowl from the homeware section of a store.
Plastic Gloves And A Tinting Brush
You need to make sure that you wear plastic gloves when you dye your hair. Hair dye and bleach contains harsh chemicals that could irritate the skin on your hands.
You could also dye your hands with hair dye.
Using plastic gloves and a tinting brush for a DIY hair color application is a common and effective method to achieve precise and controlled results.
A tinting brush is a specialized tool designed for precise and controlled application of hair color. It allows you to target specific sections of hair, create highlights, or apply color to roots with accuracy.
A lot of box hair dyes come with plastic gloves included, but if not then you need to make sure that you buy yourself some.
Some boxes of hair dye come with a tinting brush, but if not then you will need to get yourself one of those as well.
Balayage highlights are hand-painted so you definitely need to use a brush.
Hair Clips Or Bobbles
Hair clips can assist in creating patterns or sections for specific coloring techniques, such as balayage or ombré.
They help maintain clean lines and separation between different color sections. When applying color to larger areas, use bubbles to bundle the hair together.
It can help prevent color from spreading to neighboring sections. Ensure the hair clips and bubbles you use are clean and won’t cause any color transfer.
Using hair clips and bubbles strategically during the hair coloring can help you achieve cleaner, more precise results and make the process smoother.
If you divide your hair into sections it can improve the overall result of your highlighted hair, as the color is distributed more evenly. Applying the color in layers will also add more depth.
It is up to you whether you use clips or hair bobbles, but clips are easier and faster to use- especially if you are wearing gloves and have hair dye on them!
An Old Towel And Old Clothes
It is practically impossible to change your hair color, whether you are adding highlights or a whole color change.
You will probably end up with bleach or hair dye on your clothes, so it is a good idea to wear old clothes that you don’t mind getting stained.
It is most important to wear an old top, but you can also wear some old shorts or pants if you are worrying about dripping dye on your trousers.
You can also wrap an old towel around your shoulders, and place one on the floor to catch any drips.
When you dry your hair after it has been colored, there might still be some color residue left on it which could come off on the towel.
It is a good idea to use an old towel to dry your hair to avoid staining a newer one.
Tin Foil Or Plastic Wrap

If you have ever had your hair highlighted in a salon then you will know that a lot of hairdressers use ‘foils’ to separate the bleached or dyed hair from the rest of the hair.
This stops any bleach or hair dye getting on the sections that you have chosen to leave your natural color.
This is optional, but it can help you to achieve a neater and more precise final look.
Using plastic wrap can sometimes be preferable to using tin foil, as it allows you to see how the color of your hair is progressing without having to open the foils.
Conditioner
Coloring your hair, whether you use hair dye or bleach, will cause some damage.
It might not be noticeable straight away, but it is still really important to take extra steps to ensure that you look after your hair.
Conditioner is essential for maintaining your hair’s softness, elasticity, and overall health.
It replenishes moisture and smooths the hair cuticle, reducing frizz and making it more manageable.
Color-treated hair is more susceptible to damage, so a specially formulated conditioner can prevent tangling, breakage, and fading.
Conditioner provides slip to your hair, making it easier to detangle after washing and preserving its integrity.
It can also add a healthy shine to enhance your hair color’s overall appearance and vibrancy.
You will need plenty of conditioner to make sure your hair is soft and supple and does not go dry.
You could also get a deep-conditioning treatment to give you hair a special treat and ensure it doesn’t get damaged.
Depending on your hair type you can also use some oil, like coconut oil or argan oil, to restore moisture and nourishment to your hair after coloring.
Keep In Mind
- Product Research: Research and choose the right highlighting product for your hair type and desired outcome. Consider your hair’s undertones for the best match.
- Skin Sensitivity: Conduct a skin patch test with the highlighting product to ensure you don’t have an adverse reaction.
- Sectioning Strategy: Divide your hair into neat and manageable sections for precise application, ensuring even and professional-looking highlights.
- Timing Matters: Follow the product instructions carefully, especially the recommended processing time, to avoid over-lightening your hair.
- Post-Highlight Care: After highlighting, use color-safe products, avoid excessive heat styling, and apply regular deep conditioning treatments to maintain the vibrancy and health of your highlighted hair.
An Extra Pair Of Hands
Achieving perfect highlights on your hair can be quite a challenge, especially when accessing the back of your head.
However, seeking help from an extra pair of hands can make the process easier and more efficient.
With someone assisting you, tasks like sectioning, holding hair, placing foil, and ensuring even application can be done quickly, leading to better results.
It is up to you whether you choose to dye your hair alone or ask a friend or family member to help you, but having an extra pair of hands can be useful.
It is also great to have someone who can see how the hair looks from all angles, to check whether the color is even.
Step By Step Instructions On How To Dye Your Hair At Home

Now that you have everything you need at hand, it’s time to make a start. We have put together instructions on how to dye your hair so you can achieve the look that you want.
It is recommended to read all of the instructions before you start so you know what to expect.
You will also get a better idea of how long it will take you so you know how much time to set aside.
Step One – Complete A Test Strip
This first step is by far the most important. Having an allergic reaction to hair dye or bleach is very serious and can result in some negative side effects like skin burns and irritation.
Not many people are allergic to hair dye, but you need to perform a strip test to check before you go ahead and put the hair dye all over your head.
Dab a small amount of the mixed product on your skin behind your ear and wait and see how your skin reacts.
You can also apply some of the product to a small strip of your hair to see how your hair reacts and how long it is likely to take to get to your desired color.
Step Two – Style Your Hair
You might not see the point in styling your hair before you dye it, but it can actually be very useful.
Balayage highlights are hand painted in a way that accentuates the shape of your hair, making it look more full-bodied and giving it more movement.
If you wear your hair curly or wavy it can be very helpful to style your hair first so you can see where to apply the hair dye.
Try not to use too many hair products during the styling process as it can create a barrier between the hair and the dye and stop the hair from taking on the right color.
Step Three – Mix Up Your Hair Dye
The next step is to mix up the hair dye according to the instructions on the box, which may vary slightly depending on the brand you have chosen to use.
Usually, you will need to mix the tube of color with the activating solution and sir it until they are fully combined.
Make sure you put on your plastic gloves first, and stir the mixture gently so you don’t spill it or flick it anywhere.
Step Four – Apply The Hair Dye to Your Hair

Once the hair dye is mixed, it is time to apply it to your hair. You will need to work fairly quickly to ensure that the dye has enough time to develop evenly on the hair.
This is also the case if you are using bleach.
First you will need to section your hair- clip it all up apart from a small amount of the bottom layer of hair.
Dip your tinting brush into the bowl of hair dye or bleach and and very carefully paint the strands of your hair that you want to highlight.
Repeat this process, letting a bit more hair out of the clip each time- try and keep the layers as even as possible.
You want to make sure that your highlights are delicate and not too chunky – try and keep them the width of the shoelace or thinner.
You can vary the width of the highlights to create different looks, but make sure that the thickest highlight is not more than twice the thickness of your smallest highlight.
A great technique is to start with the hair that is closest to your face and then work back to the rear of your head.
Make sure you pay extra attention to the ends of your hair as they take the longest to develop the color. The roots take the least amount of time so you should get to those last.
The great thing about balayage is that it is hand painted and is not supposed to be perfectly neat. This means that your highlights don’t need to be symmetrical.
The best way to apply balayage highlights is in a ‘V’ shape. Take the section of hair you want to highlight and apply the dye to the bottom of the section.
Blend the product up the strand of hair to create a gradient, with less and less product the closer you get to the root. Keep most of the product on the edges of the section of hair and less in the middle, creating a ‘v’.
This will make the overall effect much more natural looking. You can blend the dye with your fingers, a brush, or a toothbrush depending on how fine and precise you want it to be.
Once you have applied the product to a piece of hair, you can wrap that section in plastic wrap of foil to stop the dye or bleach getting on any other pieces of hair.
This step is optional but it can help to make the finished result more professional. If you have a friend helping you it would be easier to get them to do this bit for you.
Step Five – Wait For The Color To Develop
Once you have applied the hair dye or bleach to your hair you need to wait for the color to develop.
Whether your hair is in foils, plastic wrap, or loose, you can clip it back carefully to keep it off your neck while you wait.
The length of time you have to wait depends on which product you use and what color you are trying to achieve. Make sure you check the instructions of the box on the product you are using.
The average time is around thirty minutes but you should check the color every 10 minutes to make sure you don’t make it too light.
If you aren’t sure, it is better to get in the shower and start rinsing the dye off.
You can leave the bleach on your hair but no longer! If you leave the bleach on your hair for longer than an hour then it could cause damage.
Make sure you set a timer so you don’t leave the dye on too long.
Step Six – Wash Off The Dye
Once the time is up it is time to wash off the hair dye or bleach. You can do this over the side of the bath or in the shower.
Carefully remove the foils or plastic wrap, rinse out the hair dye, then wash your hair thoroughly with shampoo.
Once you have rinsed out the shampoo you can condition your hair or use a deep conditioning treatment. You can let your hair air dry, or blow dry it depending on how you like to style it.
If you are keen to find out how the color turned out then you might want to blow dry it so you can find out quicker!
Pro Tip
Use a highlighting cap with a hook for a controlled and personalized highlighting experience, especially if you’re new to DIY highlights on dark hair.
Step Seven – Toner
This is an optional step – if you have managed to achieve the color that you wanted from steps one through to six then fantastic! You don’t need to complete any more steps.
However, achieving perfect highlights on dark hair at home often requires the use of toner to get the right shade.
The initial result could be more orange or brassy than desired, but this is easy to fix.
The toner alters the undertones of your highlights to adjust the shade. Whichever tones you want to get rid of, you should choose a toner that is the opposite color on the color wheel.
If your hair has too many yellow undertones you should use a purple or blue toner to create a more ashy shade of blonde.
You will need to mix the toner with the developer – you can use the same bowl you mixed the hair dye in with but make sure you watch it first.
Apply the toner evenly to the highlighted sections of your hair.
You don’t need to be as precise as you were with the bleach or the hair dye, but if you get toner on the sections of your hair that don’t have dye on it could affect the undertones of your natural color.
Let the toner stay on your hair for 15 minutes, or until you have achieved the color you are aiming for.
Once you have achieved your desired color, you can rinse out the toner until the water runs clear. You should then shampoo your hair to make sure it is clean.
You can apply more conditioning treatment to your hair if you think your hair can take it.
It depends on your hair type – thicker hair would probably benefit from a second conditioning treatment after being colored, but if your hair is thinner then too much conditioning in one day could make it go greasy.
Step Eight – Enjoy Your New Look
Once you have washed the toner out of your hair you can style how you wish and enjoy your new look!
You will love how your hair looks with highlights, and you can be proud that you did it yourself at home, and saved yourself more money than if you had it done at a salon.
Which Highlight Shades And Styles Are Trending In 2022?

If you want to try DIY highlights but you can’t decide which shade or style to go for, then check out this list of the top trending highlights for 2022.
Face Framing Highlights – If you go for face framing highlights then you can have a nice change without dying too much of your natural hair. It is a very low maintenance hairstyle that never goes out of style and suits every face shape and complexion.
Curly Highlights – If you have naturally curly hair or you like to wear your hair in a curly style often, you could try curly highlights. If you curl your hair before applying the dye then you can apply it to each individual curl, making a shapely three dimensional hairstyle.
Cinnamon Highlights – Warm highlights, either in a cinnamon or gingerbread shade, are perfect for dark brown or black hair with red undertones. It is a perfect style to try out for the winter months, especially the holiday season.
Honey Highlights – Honey highlights are warm and rich with multiple tones. It is perfect for the Summer or Fall, and goes really well with hair that is a chocolate color.
Mocha Latte Highlights – Mocha latte highlights use a combination of blight brown and honey blonde highlights on naturally dark brown hair. This creates a delightful mix of colors which adds lovely texture and volume to any hair shape.
Caramel Highlights – Caramel highlights are a classic choice for dark brown hair, as they add a lighter color without the contrast being too stark. It creates a chocolate and caramel effect that is complementary to many different complexions.
Ash Blonde Highlights – If your naturally brown hair has cool undertones then ashy highlights would be perfect for you.
Strawberry Blonde Highlights – Strawberry blonde highlights are rich and warm and look wonderful against pale skin.
Chestnut Highlights – Whichever shade of dark brown hair you have, chestnut highlights will look fantastic on you. They are stylish, sleek and bang on trend.
Golden Brown Highlights – Golden blonde is one of the most popular colors for highlights, as it goes with many shades of brown and lots of different skin tones.
Auburn Highlights – Auburn is a color that blends really well into brown hair that has some undertones of red. It is perfect if you want to switch up your hair for the Fall season.
Natural Methods To Lighten Your Hair
If you want to lighten your hair but would prefer a more natural method there are ways to achieve this.
Option One- Lemon. Conditioner Or Coconut Oil
You can make a mixture that is one part water and one part fresh lemon juice and apply it to your hair for a natural lightening method.
Sit in the sun to activate the lemon juice and lighten your hair. Let’s talk about lemons.
Lemon juice is very acidic and can cause some damage to your hair. You can try mixing the lemon juice with conditioner or coconut oil instead of water to reduce the damage.
Option Two – Cinnamon, Olive Oil And Honey
The combination of honey and cinnamon has a lightening effect on hair – you could achieve a shade that is two shades lighter than your natural shade!
The olive oil is added to the mixture for additional nourishment.
Mix two tablespoons of honey, one tablespoon of cinnamon, and one tablespoon of olive oil.
Option Three – Apple Cider Vinegar
Apple cider vinegar is excellent for your hair overall. It will not only lighten it but also make it easier to detangle, soften it, and remove all the excess oils.
Mix apple cider with water and pour over your hair.
Option Four – Henna
Henna is great for lightening your hair without causing any damage. It is a natural product from plants that is used to dye hair, leather, wool and even skin.
Mix 3 tablespoons of your light henna with half a cup of boiling water, then let it sit overnight. The next day you should apply it to your hair and leave it for at least two hours, then wash your hair as you usually would.
Peroxide And Baking Soda
If you don’t want to use bleach on your hair then you can use hydrogen peroxide. Mix three tablespoons of hydrogen peroxide with one cup of baking soda and stir it into a paste.
Apply it to your hair and leave it on for no more than 60 minutes before washing it off.
Did you know?
DIY highlights on dark hair have been a popular beauty trend for years, and with the right products and techniques, you can achieve salon-quality results from the comfort of your home, saving both time and money.
- 45 Mushroom Hair Ideas: Trending Tresses for All Occasions In 2025 - December 6, 2023
- 45 Short Crochet Hairstyles That Slay the Short Game in 2025 - December 5, 2023
- 45 Short Wavy Hairstyles That Are Making Waves In 2025 - December 3, 2023