
Merry Christmas, lovelies! I’m about to head out to spend some time with my in-laws visiting me from Korea, but I’d do a quick blog post about these cute headband braid hairstyles tutorials I created for you last week. What are you guys doing today?
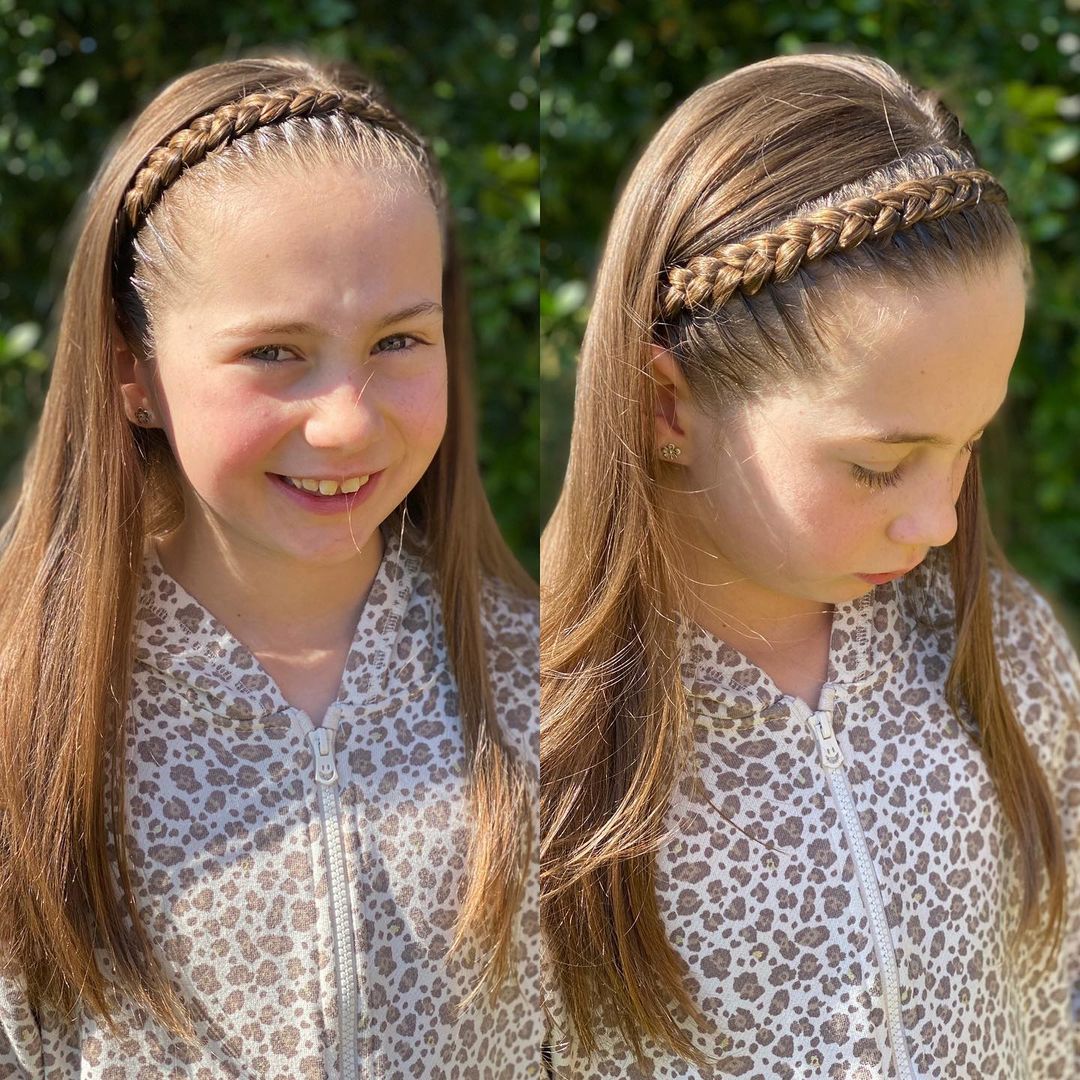
Image by @braided_babes via Instagram
I get so many requests for easy hairstyles for school and braided headband styles in particular. Initially, I had planned to do a regular headband braid look with a French braid, a Dutch braid, and a French fishtail braid.
Still, after doing the first style, a French braided Headband Braid, I decided to make it easy and lazy instead because I know how some of you struggle with French braids. So, although the first style is an authentic French braid, the last 2 are super-duper LAZY EASY braids!
Style & Aesthetic Of Headband Braid Hairstyle
The headband braid hairstyle is a game-changer for anyone looking to make a style statement. It effortlessly blends a laid-back vibe with a touch of elegance.
Imagine a braided halo that frames your face, giving you an ethereal yet down-to-earth look. This style screams versatility. Wear it to a casual picnic or a fancy dinner; it works!

Creating a headband braid isn’t rocket science. You simply section off the hair around your crown and braid it. Wrap it around your head like a halo, and you’re good to go. Don’t worry about stray hairs; they add a charming, relaxed feel.
The best part? This look suits any hair texture. Whether your hair is straight, wavy, or curly, the headband braid adds a boho-chic flair.
Feel free to accessorize! Add some flowers for a romantic touch or a few sparkling pins for glam. The headband braid is more than a hairstyle; it’s a style statement that lets your personality shine!
Essential Supplies
Creating a headband braid is pretty straightforward and doesn’t require many supplies. Here’s a simple list to get you started:
- Comb or Hairbrush: To detangle and smooth your hair before braiding.
- Hair Elastic Bands: To secure the ends of your braid or braids.
- Bobby Pins: To pin the braid in place around your head.
- Hair Spray: To set the style and tame any flyaways.
- Optional Accessories: Flowers, beads, or decorative pins to add some flair.
- Mirror: To check your progress and make sure the braid looks good from all angles.
- Sectioning Clips: These can help keep the hair you’re not working with out of the way.
- Hair Gel or Cream: Optional for extra hold or to manage frizz.
And there you have it! These basic supplies help you create a stunning headband braid hairstyle. Happy styling!
3 Different & Easy Headband Braids
1. French Braided Headband Braid

Image by @hair_styles28 via Instagram
Skill Level: Intermediate
Required Time: 15-20 minutes
Essential Materials:
- Comb or hairbrush
- Hair elastic band
- Bobby pins
- Hairspray (optional)
- Sectioning clips (optional)
Instructions:
Preparation: Start with dry, detangled hair. Use a comb or hairbrush to remove any knots.
Section Hair: Use a comb to part your hair from one ear to the other, creating a horseshoe-shaped section on the top of your head. Use sectioning clips to keep this hair out of the way.
Begin Braiding: Choose a starting point near one ear. Take a small section of hair and divide it into three equal parts.
Initiate French Braid: Begin a regular braid by crossing the right strand over the middle, then the left over the new middle.
Add Hair: As you continue braiding, start incorporating more hair into the braid from the sectioned-off area. It is what makes it a “French” braid.
Direct the Braid: Direct the braid over the top of your head like a headband. Keep the tension even for a neat finish.
Finish Off: Once you reach the other ear, stop adding new sections to the braid. Carry on with a three-strand braid until you go to the end of the hair.
Secure the Braid: Use a hair elastic band to secure the end of the braid.
Pin in Place: Use bobby pins to tuck and secure the tail end of the braid behind your ear or wherever it feels most comfortable.
Set the Style: Optional, but for a long-lasting hold, use a light mist of hairspray to set the braid in place.
Additional Notes:
- For a more relaxed look, gently pull at the loops of the braid to give it a slightly “undone” feel.
- Feel free to accessorize with decorative pins or flowers to make the style your own.
- This hairstyle works best on medium to long hair lengths.
- With these instructions, you can create a stunning French Braided Headband Hairstyle. Enjoy!
RELATED: 81 Bold And Beautiful Large Box Braids For Oozing Confidence
2. Basic Headband Braid
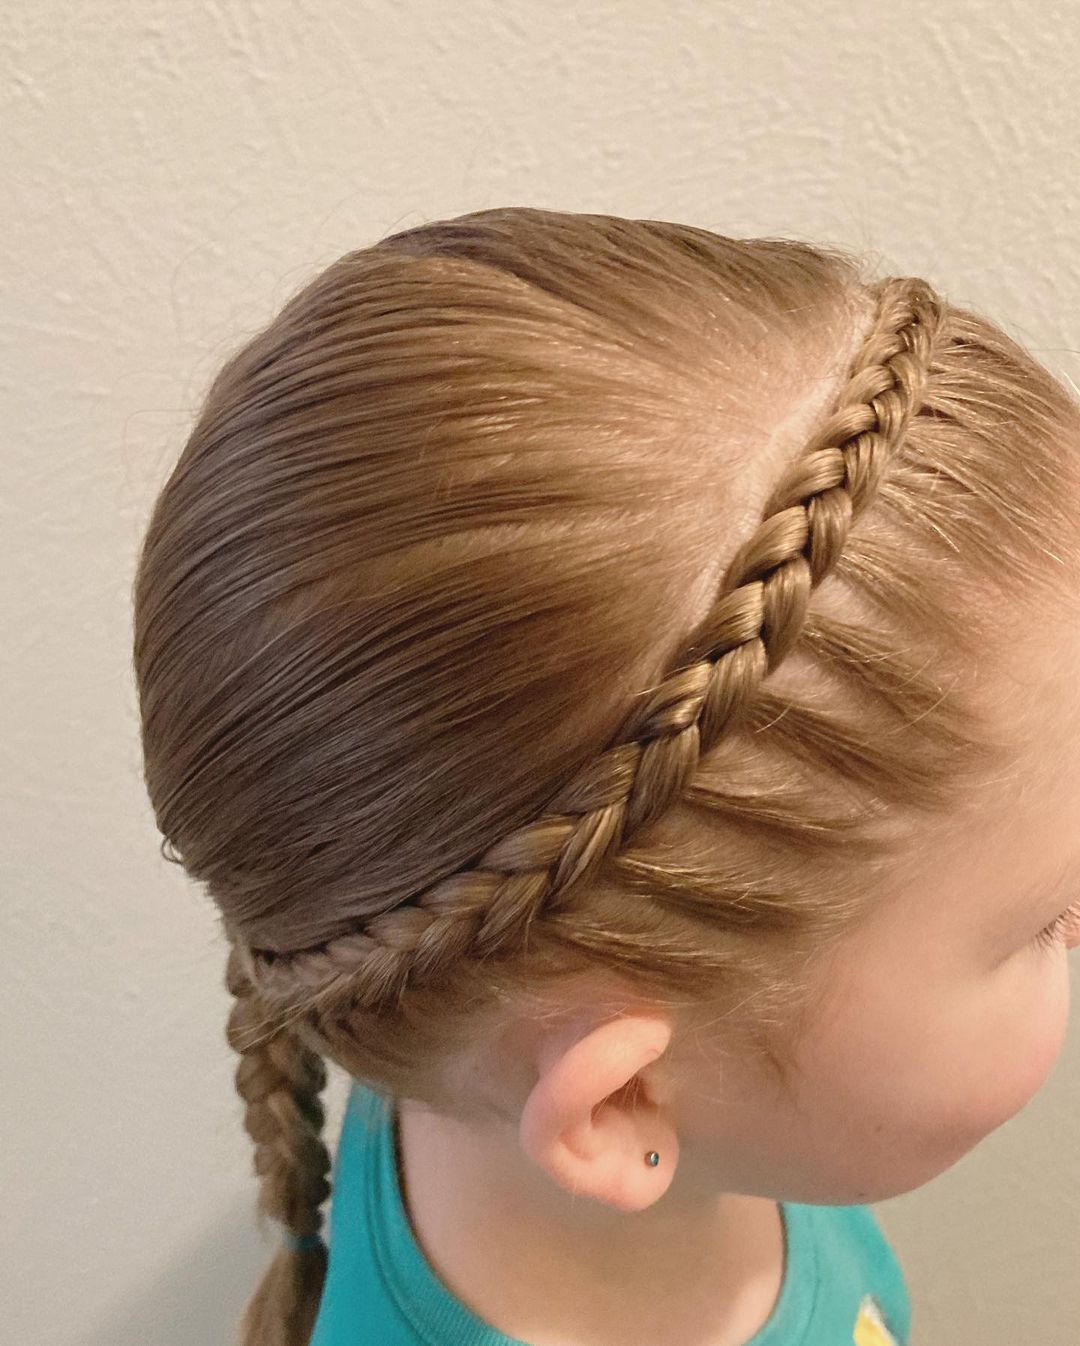
Image by @clairabelle_hairabelle via Instagram
Skill Level: Beginner
Required Time: 10-15 minutes
Essential Materials:
- Comb or hairbrush
- 1-2 Hair elastic bands
- A few bobby pins
- Optional: Hairspray for extra hold
Instructions:
Prep Your Hair: Make sure your hair is clean, dry, and tangy-free. Use a comb or hairbrush to smooth it out.
Section the Front: Take a section of hair from behind one ear, about 1 to 2 inches wide, depending on the thickness of your hair.
Start Braiding: Divide this section into three equal strands and start a basic three-strand braid.
Braid to the End: Continue braiding until you reach the end of the section. Try to keep the tension even so the braid doesn’t become too loose or too tight.
Secure the Braid: Use a hair elastic to tie off the end of the braid.
Position the Braid: Gently lift the braid and lay it across the top of your head, like a headband. Adjust it so it sits where a headband would normally rest.
Pin It: Use bobby pins to secure the braid behind your opposite ear. Make sure it’s tight enough so the braid won’t slide but not so tight it causes discomfort.
Check and Adjust: Look in the mirror to ensure the braid is flat and positioned to your liking.
Optional Hold: Give it a quick spritz of hairspray if you want extra hold.
Additional Notes:
- For a slightly different look, you can also start the braid from the middle of the nape of your neck and wrap it around one side of your head.
- Feel free to accessorize by adding small flowers, beads, or decorative pins along the braid.
- If your hair is slippery or freshly washed, a touch of hairspray or dry shampoo before braiding can provide a better grip.
- That’s it! With these simple steps, you’ll have a beautiful Basic Headband Braid Hairstyle in no time. Happy braiding!
RELATED: 65 Gorgeous Jumbo Box Braid Hairstyles For A Strong Braid Game In 2024
3. Bohemian Headband Braid
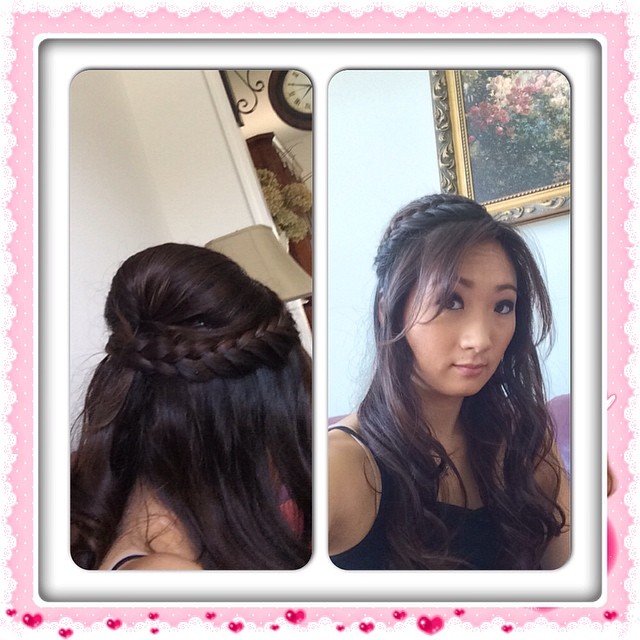
Image by @hairbyaysha via Instagram
Skill Level: Beginner
Required Time: 15-20 minutes
Essential Materials:
- Comb or hairbrush
- 1-2 Hair elastic bands
- A few bobby pins
- Optional: Hairspray for extra hold
- Optional: small flowers or beads for accessorizing
Instructions:
Prep the Hair: Make sure your hair is clean and slightly wavy for that bohemian feel. Use a comb or hairbrush to get rid of any tangles.
Section the Hair: Take a 1 to 2-inch section from just above one ear.
Start Basic Braid: Divide the section into three equal parts and begin a simple three-strand braid.
Continue Braiding: Braid the hair to the end. Remember, bohemian is about relaxed vibes, so don’t worry about making it too perfect.
Secure the Braid: Use a hair elastic to tie off the end.
Lay the Braid: Drape the braid across your head, aiming for it to rest like a headband.
Pin and Secure: Use bobby pins to fix the braid behind your other ear.
Gently Loosen: To get that relaxed bohemian feel, gently tug at the braid loops to loosen it up a bit.
Optional Add-ons: Insert small flowers or beads into the braid for that extra boho touch.
Optional Hold: If you’d like, give it a light spray of hairspray to set your look.
Additional Notes:
If you have shorter hair, you can create two smaller braids from either side and pin them to meet in the middle.
You can curl the rest of your hair or let it be in its natural state for an even more relaxed look.
Feel free to experiment with hair accessories that reflect your style; bohemian is about expressing yourself!
And there you go! You now have a chic and relaxed Bohemian headband braid hairstyle tutorial. Enjoy rocking this carefree look!
RELATED: 61 Dutch Braid Hairstyles to Inspire Inverted Elegance
Styling Tips For Headband Braid Hairstyle
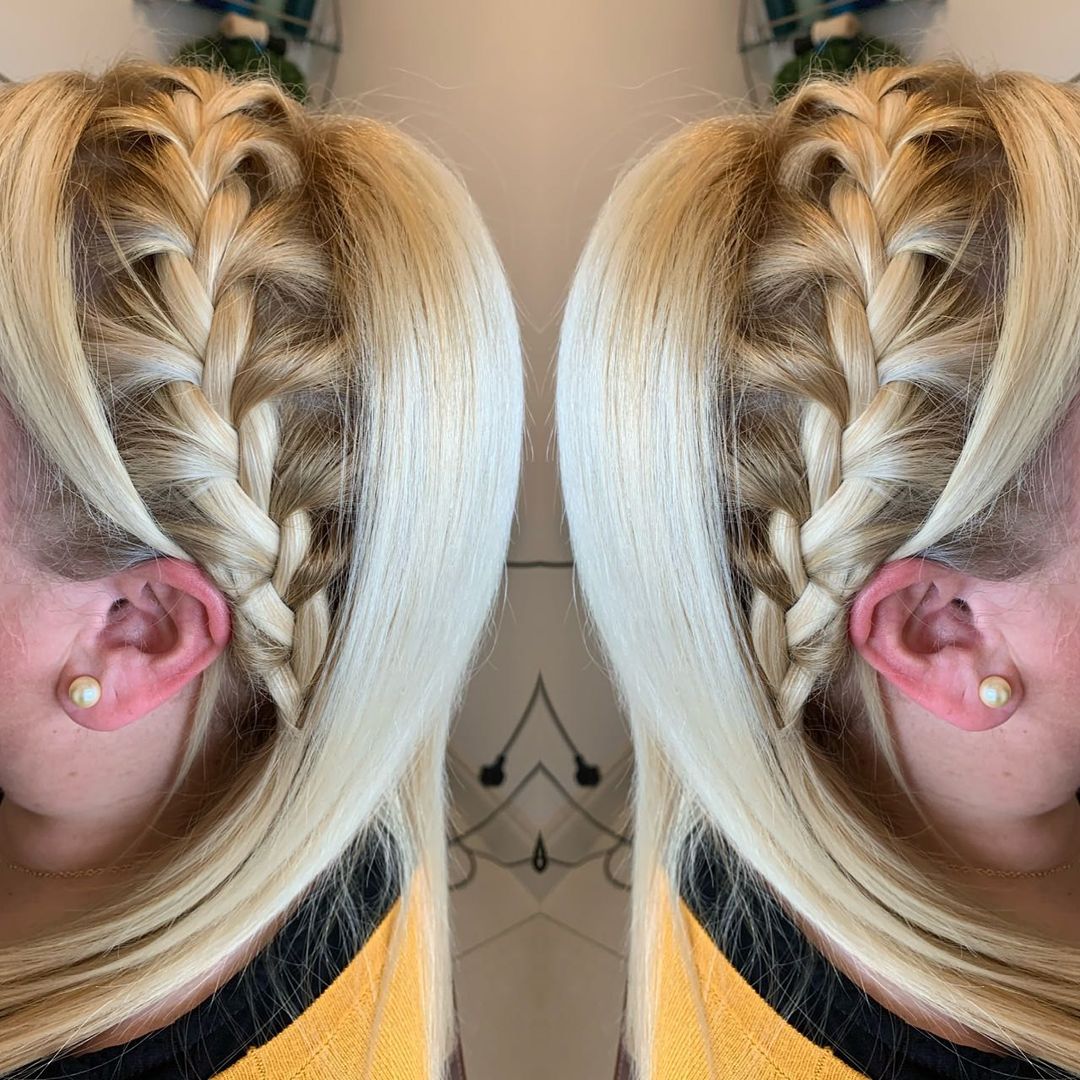
Image by @blakehairdesign via Instagram
A headband braid is not just a hairstyle; it’s a canvas for your expression. Here are some styling tips to help you make the most out of this versatile look:
Texture Matters: Before braiding, consider adding some texture to your hair. Whether you use a texturizing spray, mousse, or old-fashioned sea salt spray, a little grip makes braiding easier and adds a beachy vibe.
Accessorize: Don’t shy away from embellishments. Be it flowers, beads, or sparkly hairpins, accessories can elevate your headband braid from cute to stunning.
Mix Braids: Who said a headband has to be one single braid? Mix some fishtail or Dutch braids with the classic three-strand for a playful, intricate look.
Loose or Tight: A looser braid gives off a relaxed, boho-chic vibe, while a tighter braid can look more polished and formal. Adjust the tension according to the occasion.
Double Up: For a unique take, create two parallel headband braids. It adds depth and dimension, making your hairstyle a conversation starter.
Contrast: If you have highlights or multi-toned hair, a headband braid can showcase these beautifully. The interwoven strands create a striking contrast.
End Placement: Think about where the end of your braid will go. Tucking it under a layer of hair gives a seamless look, but letting the tail end drape freely can be its own style statement.

Go Asymmetrical: Who says the braid has to go straight across? For a more edgy look, angle your braid to start higher on one side and lower on the other.
Add Volume: For a more dramatic look, gently pull apart the braid after securing it. This “pancaking” technique gives the illusion of a fuller, more voluminous braid.
Endgame: A spritz of hairspray or a dab of hair gel can ensure your beautiful braid stays put all day long.
Remember, the headband braid is as flexible as you are. Feel free to experiment and put your twist on it. Happy styling!
RELATED: 61 Dutch Braid Hairstyles To Inspire Inverted Elegance In 2024
A Quick Recap
Whether you’re a beginner or more experienced, headband braids offer a versatile and stylish way to jazz up your hair. Opt for a bohemian style with loose braids and floral accents for a laid-back look. If you prefer something more polished, go for a neat French braid. Material-wise, you’ll need a comb, hair elastics, and bobby pins. Accessories and hairspray are optional but can add that extra flair. Remember, the headband braid is a canvas for your creativity—experiment with tension, braid types, and placement to make it uniquely yours!

- 31 Soft Locs & Distressed Faux Loc Hairstyle Ideas For Revolutionizing Texture And Messy Marvels In 2025 - December 4, 2023
- 45 Faux Locs Styles For Black Women: The Ultimate Inspiration In 2025 - December 3, 2023
- 65 Fun and Flirty Two-Strand Twist Hairstyles To Achieve Confidence In 2025 - November 28, 2023